| |
| The REVO has been out for some time now and it has even won a few awards from the magazines for its design and overall performance. We felt that with the sea of Savage's and Maxx's all around us, it was time to try something new. The Revo is "new" in its design and we thought it would be fun to see if indeed it could be made into a bash worthy unit. This project will be a little departure from previous projects in that we are going to give you more pictures and less chatter. The project is nowhere near complete however we wanted to start sharing what we have done so far and you'll just have to wait and see what is next! We picked up a used REVO from a BYT Forum member and had to replace a few items to get it back to square one. All in all, it was in pretty good shape when we received it and was a great place to start a project like this. |
| |
| The truck came to us with RPM suspension arms installed
on the front left upper and lower only. Obviously the truck had been in
some sort of collision as the front left corner was upgraded with RPM
arms. The truck also came with the forward only kit installed and that
is a bonus. Do real bashers use reverse (sounds like a good question for
the BYT
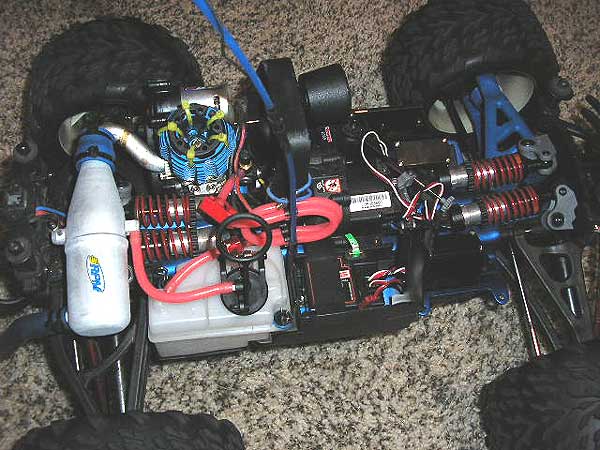
Forum)? On initial teardown and inspection of our used beauty, we discovered a broken front bulkhead brace, a trashed steering servo and leaking front differential. It is safe to say that all of this damage was caused by the crash that took out the front arms. Here is a picture of the truck as we received it (yes my friends.....that is pink fuel line and a decal on the exhaust pipe).
The truck did have a set of Traxxas 7075 push rods installed and we are going to leave these on for a laugh and see how long they will actually last. We grabbed some Lunsford turnbuckles and hinge pins to install while we had everything apart. BYT is a big fan of Lunsford goodies and they have always served us well. We stripped off all the pink lady fuel line and also the EZ-Start. New blue fuel line was installed and a Traxxas recoil starter was added to fire up the 2.5R engine. The radio boxes, left and right, were also replaced so we could keep a lid on our electrics. As the Opti-Drive was out (forward only conversion installed), we cut a small piece of left over painted lexan from our RC18 project body and glued it into the opening on the right side box to keep debris from coming in. |
| |
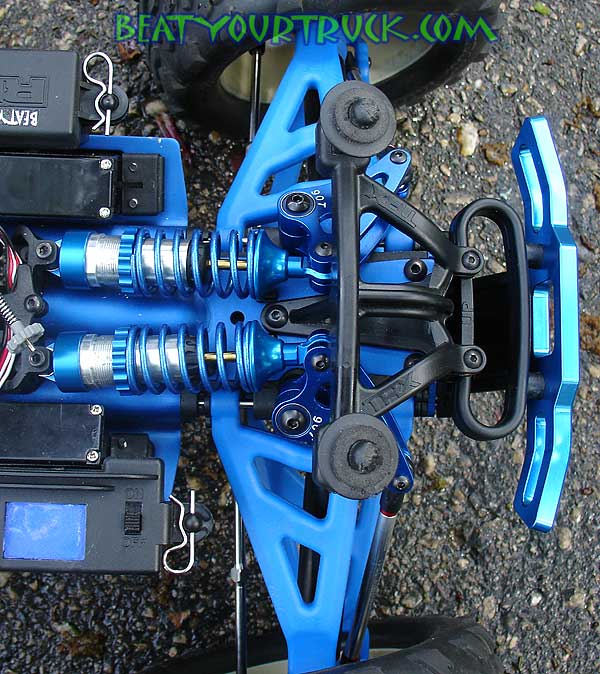
| Stage 2 will focus on really beefing up the suspension. As the truck already had a couple of RPM arms installed, we thought we would complete the package and install them on the remaining corners. Along with the arms, we opted for RPM Axle Carriers for added strength at the wheels. We ordered blue ones but got the white ones and decided to dye them rather than return them and wait for the correct pieces. They turned out pretty good (RIT Royal Blue and yes, our hands are still blue)! We also tossed our stock P2 rockers into the dye soup and walla! Blue rockers! |
|
|
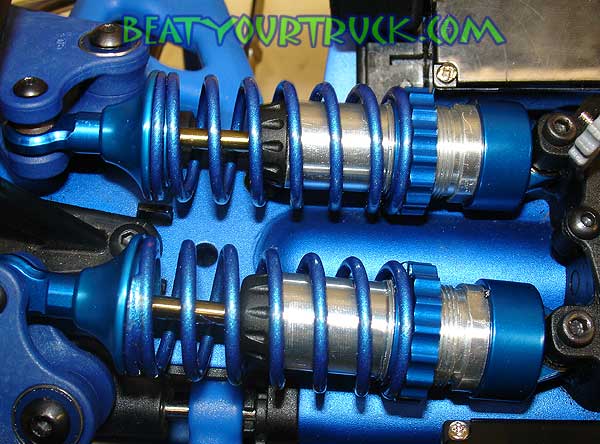
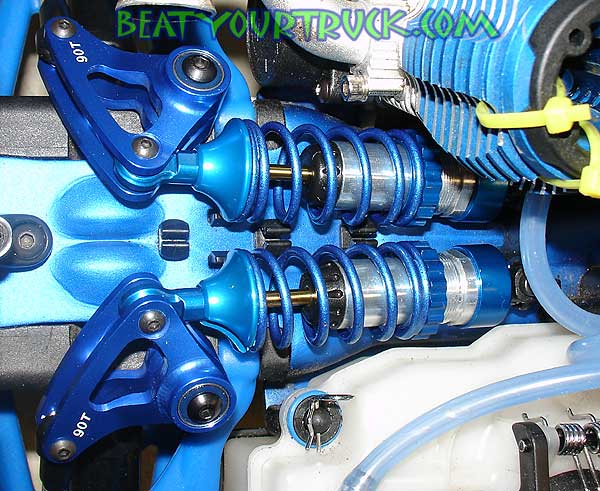
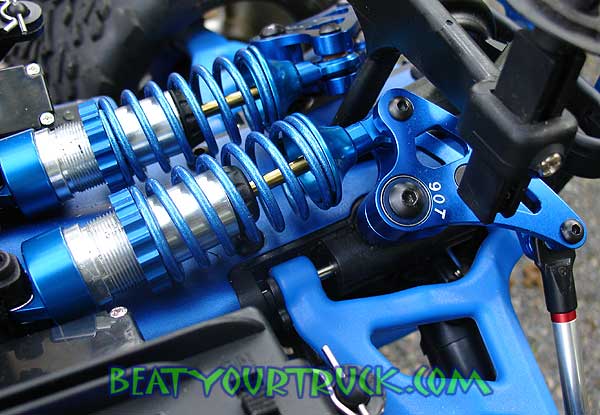
| Our next item to attack was the shocks. We opted to stick with the stock shock bodies for the time being and upgrade the other shock components. We added GPM aluminum spring adjusters, GPM aluminum caps and GPM aluminum spring retainers. We also installed Traxxas gold springs in front and Traxxas black springs in the rear. We hit the springs with some blue metal flake paint to jazz them up a little and make them look a little more custom. They turned out great! Trinity 50wt shock oil was poured into the front and rear shocks. Some bashing time will tell how this works out but from the feedback we received from some other big air Revo bashers on the BYT forum, it should work well. |
| |
| Despite our handy dye work on the stock rockers, the plastic just needed to go. So we installed some P2 aluminum rockers from 3Racing on the front and rear. They look great and they will add some strength to the shock system. The rigidity of the rockers should also add some responsiveness in the rough stuff. We need all the help we can get when it comes to keeping the tires on the ground! |
| |
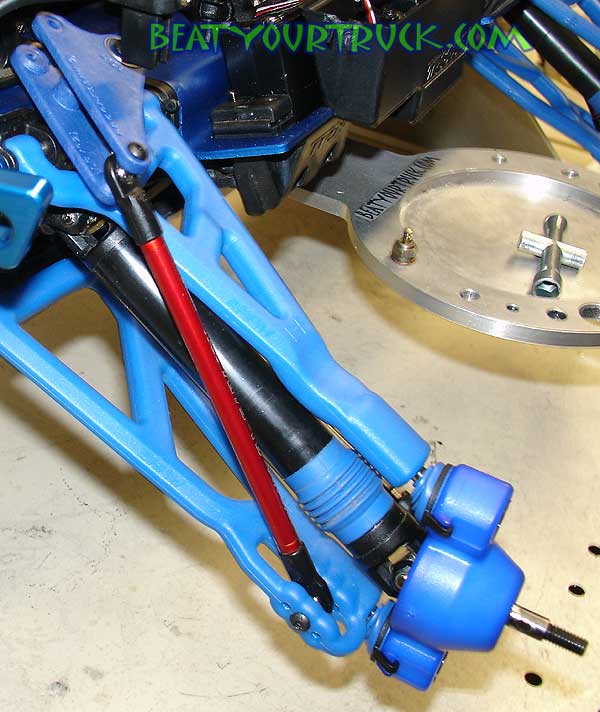
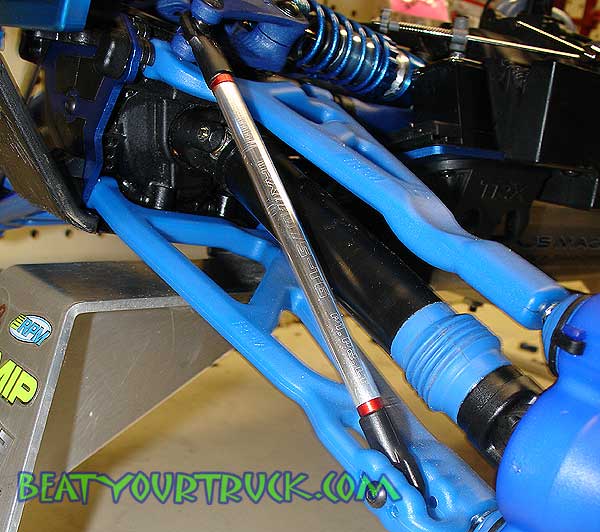
| As you might have noticed from one of the pictures above, the Traxxas red push arms stick out like a sore thumb in our sea of blue Revo. So we picked up some Greased Lightning cleaner and stripped off the anodizing. It was a simple process however you will want to do this in a well ventilated area, wear safety glasses and some good chemical safe rubber gloves.. We removed the rod ends and washers, placed the rods into a plastic tray (picked up at the Dollar Store for you guessed it, $1), submerged them in the Greased Lightning and waited. In a few minutes we could see the red bleeding off the parts. Every 5 minutes or so, we would pull the rods out and wipe some of the red off, then place them back in the solution. After about 30 minutes, the rods had been completely stripped and with a quick polish, they looked like a million bucks! We left the red washers in their original state to give the rods a little more detailed look. |
| |
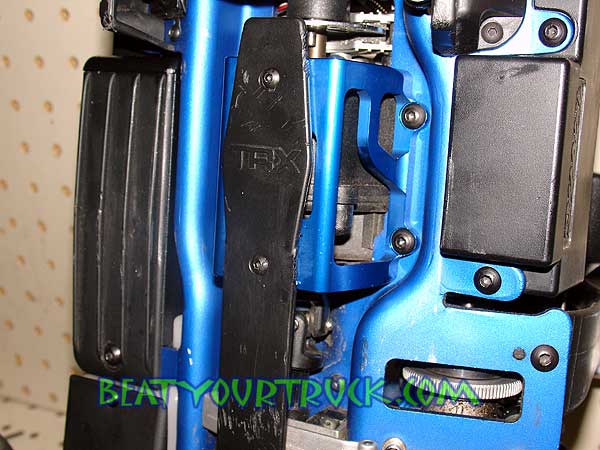
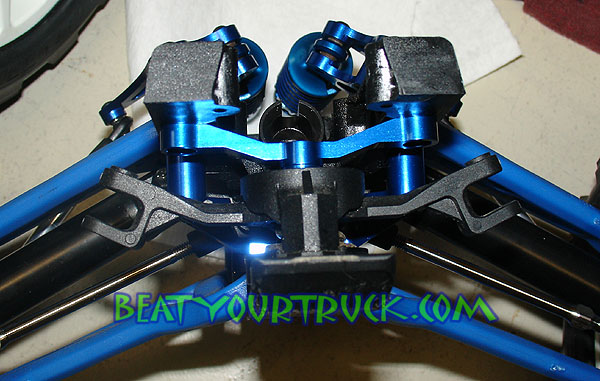
| While we were replacing this and that on our Revo, we found the front bulkhead brace already shattered. This is a fairly common occurrence as we understand it and opted to beef this area up right away. A 3Racing aluminum brace was installed to keep the front end in tact. |
| |

| During one of our many journeys around the web scouting for Revo goodies, we stumbled upon the 3Racing transmission guard. This is a nice piece and will help secure the transmission to the frame, strengthening the whole setup. The stock, plastic unit is a transmission guard and skid plate / all in one deal. So we cut off the skid part of the stocker and drilled a couple of holes to attach it to our new aluminum guard. It turned out rather well and we like the idea of adding some strength in this area. Stripped spur gears can easily come from chassis flex and / or an engine or transmission that is moving around too much. This should help keep the transmission in place. |
| |
| Throughout this project, we have been replacing our hardware with some sweet 12.9 black oxide stuff from FullForce RC. FFRC has a great REVO screw kit out and we are taking full advantage of it. We also picked up some super tough FFRC aluminum bumpers for the Revo. They are massively thick and look like they will take a huge beating. |
| |
| That should be a good start for our suspension upgrades. The RPM, Lunsford, Traxxas and GPM shock updates should really beef things up. Our only real worry at this point would be the stock bulkheads and the stock rod ends. Time will tell if they are tough enough! |
| |
| |
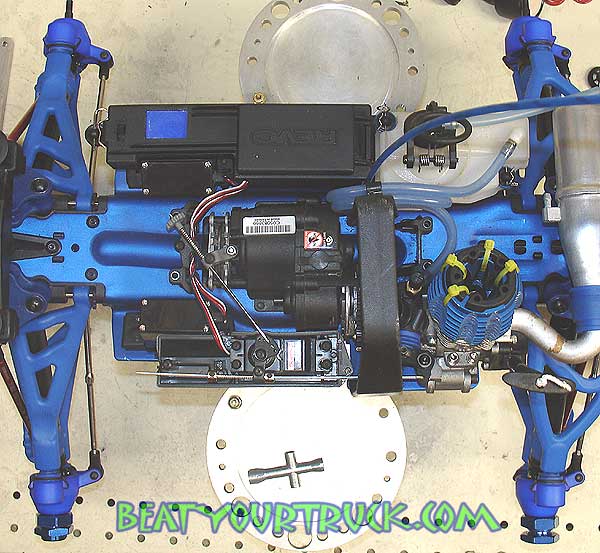
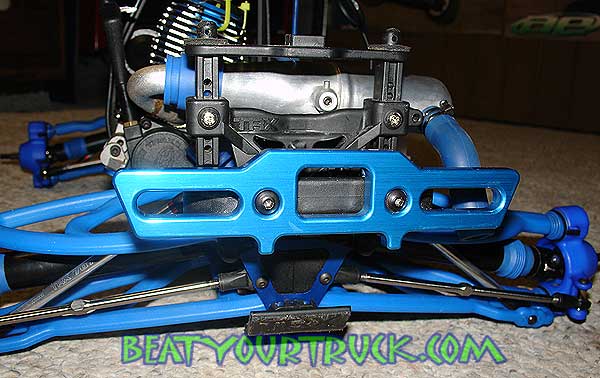
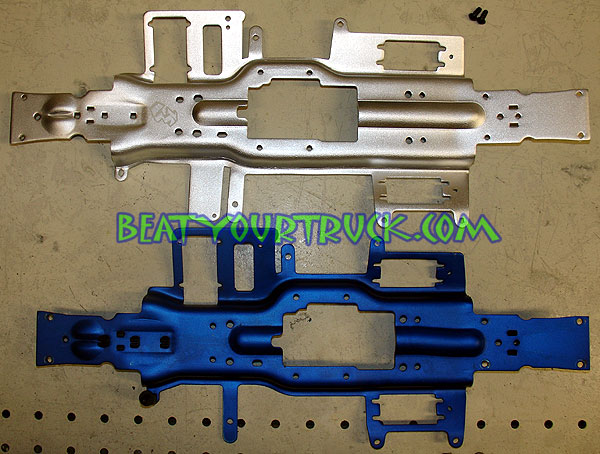
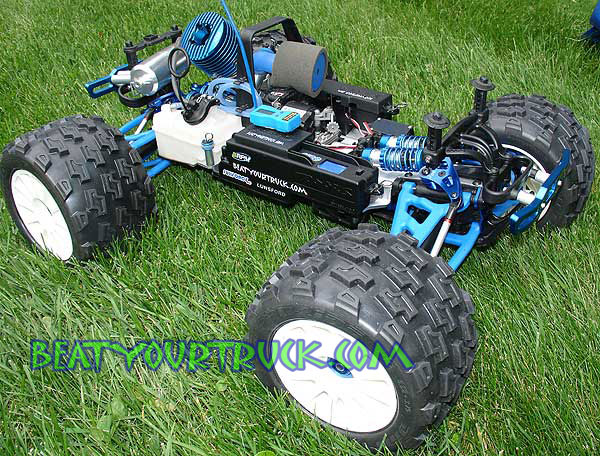
| No sooner did we have the mods above completed, we decided
to take things to the next level. Stage 3 is all about adding some power
and giving the truck the stability to handle the power. The only way to
really get there is via big block power and an extended chassis. We started
with an extended chassis (adds 30mm over stock for a total of 330mm long)
from 3Racing.
The chassis looks awesome and should give us plenty of room for a big
block engine and will also make the powerful truck more stable and drivable.
It even comes with an extended center driveshaft to compensate for the
extended length. You will notice in the picture below that the chassis
is stretched in the front of the truck. We liked this concept as it should
help keep the front end on the ground.
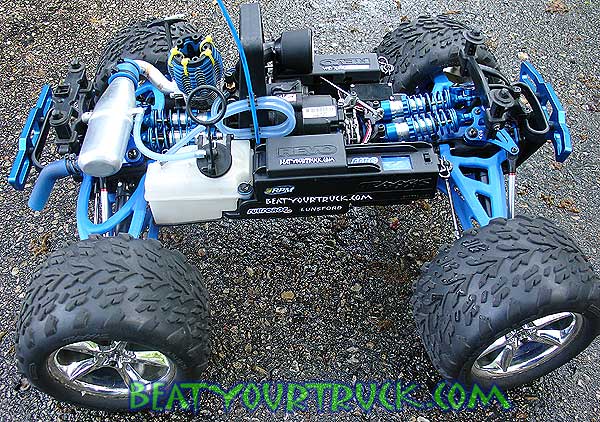
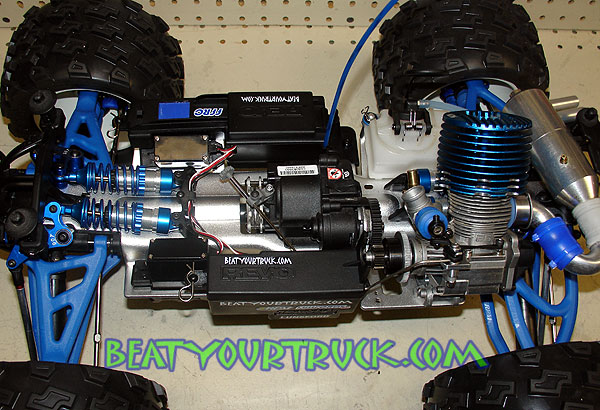
Our next install was a big block engine mount and the New Era model RV111V2 fit the bill perfectly. It comes with everything you need including linkages and the mount itself is super BEEFY and very nicely made. Installation of the mount is quick and easy. This is a high quality piece and we highly recommend it. Kudo's to New Era for doing such a great job on this mount package! New Era also offers a nice big block header package that lays flat and again, comes with everything you need to install it (retaining spring, exhaust seal, etc). We opted for one of our favorite horns to compliment our engine, the power producing and excellent sounding CVEC pipe. CVEC makes a specific pipe for the Revo with the wire mount relocated towards the middle of the pipe. While this might have been the "perfect" pipe to go with, we already had a big block CVEC on the shelf (that we used in a BB T-Maxx) and decided to use it. It required a slightly longer mounting wire and lucky us, New Era includes a long straight wire in their header kit! These guys think of everything! We decided to toss a Mach .26 into the truck as we had one on the bench (from our LST that we upgraded with the Racer Edge 32). The Mach has always been a reliable and powerful engine. It holds a tune extremely well and if it can propel the big fat LST around, it should be able to handle the Revo nicely!
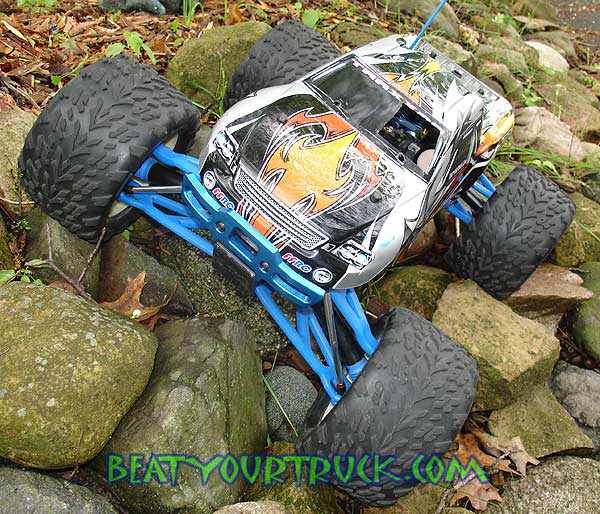
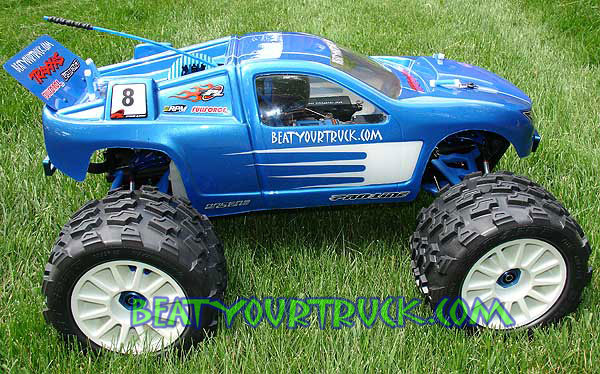
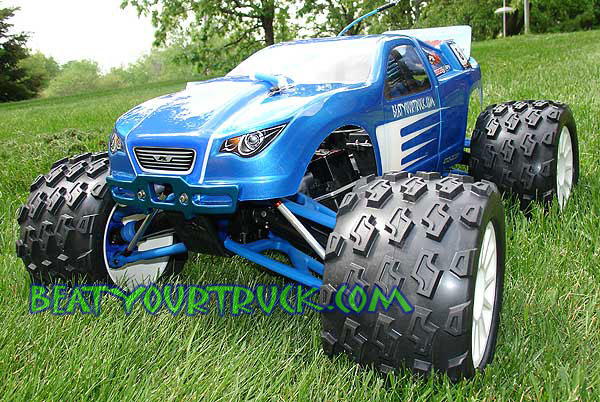
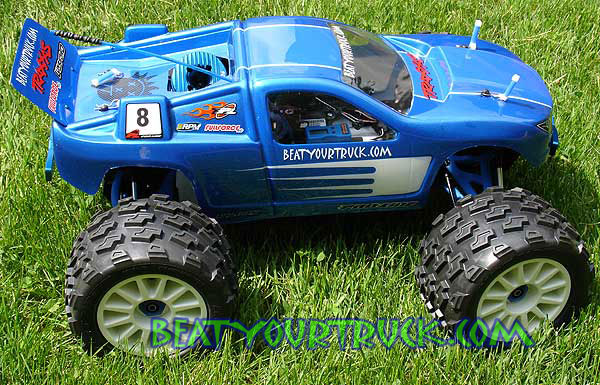
As the truck is now 30mm longer than stock, the stock body does not fit well or look good on the truck. A Crowd Pleaser 2 body for an LST (yes.....this Revo is now LST sized) fits quite well. A two tone blue paint job with some white stripes and white scallops seemed to work well with the blue truck scheme and big white Wabash's. The FullForceRC bumpers were spaced out approximately 3/8" each to make the body fit as close to perfect as possible. Finally it is ready to run! Here are a couple of "pretty" shots before we take it out and HAMMER it!
|


Advertise with Beat Your Truck * Donate to Beat Your Truck