| |
Here are a few reviews on various products we have added to our trucks. We will give it to you straight. No fluff. Maximum product rating equals
5 stars |
| |
RATING: |

This review was written by "squirrelOdeath", a highly respected member at the BYT Forum. SquirrelOdeath is a resident RC expert (especially with electronics) at BYT and is also a moderator on the BYT Forum. |
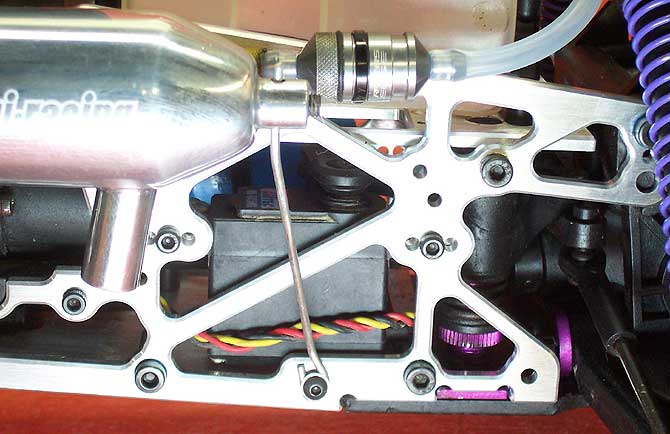
First Impressions: The towers are beautifully cut and polished. There definitely is a bling factor awarded to the silver polished aluminum but it is all with purpose. Which to me purpose and functionality is ideal on perfecting any RC. What I appreciated the most out of the towers were the extra mounting holes and options on the towers. This was especially apparent on side-by-side comparison of the stock to the FFRC aluminum. Installation: Also, the rear towers lined up to the wing mounts perfectly. I could tell that the stock towers were a little bendy. With the wing mounts being extremely bendy as well I saw this as a future problem. The aluminum towers give the mounts and wing a sturdy platform to rest on while allowing the mounts to still be a weak spot should the kit flip and break. Which, a cheap weak spot for breakage should be a consideration for any basher. Performance: At work, on the brightly polished floors, I ran the kit as a drifter. A mamba 6800KV and Apogee lipo powered buggy drifting on waxed floors is a recipe for disaster. All of the FFRC aluminum held the kit together amongst several crashes against baseboards. The extra shock position options in the towers actually allowed me to dial in the Factory Team (FT) shocks so that they actually worked better. Next I took the 18B to the streets. Now, normally my 18x’s will end up over end non-stop. This usually will result in you having to chase after the car to flip it over. Definitely not cool! I can only think that the better shock positioning aided in the balancing of the car. My car was extremely stable on the road with a 30A lipo and 6800KV motor pushing it to maximum speeds. On the flips that I did encounter the towers held up great. Speed was not an issue with a fully loaded FFRC aluminum buggy either. This buggy out performed my older 8000KV 18t with the Factory Team Billet Kit. Running the 18B in my house was a lot like running it at work. I have a lot of tile and I am able to do some drifting with the buggy. I also have a small ramp, carpet for traction, and some animals to chase. This leads to a lot of crashes against walls, the dining room table, my coffee table, and the abuse and rigors of jumping. Once again, FFRC pulled through. Normally by now, or at least on my previous kits, I would have busted a tower and a rear hub by now. This always happens. With this kit, it is lighter than before, better performance, and I have yet to break anything. I have smacked the kit head on into corners and walls at full throttle and no signs of damage. Conclusion: The towers were well thought out and machined. The added shock holes have almost paid for themselves. I still crash the kit but the savings from having to replace aluminum parts in repair bills continues to amaze me. They also give the kit a finished feel that is better than the cheap looking stock towers. It really is a well-rounded approach of fit, appearance, and performance. Another great feature of FFRC is their customer service. Response
times to my emails were always timely and virtually no waiting. All
of my answers (numerous or otherwise) were always answered in a polite
and professional stance. |
||||||||||||||
| |
RATING: |
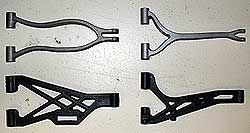
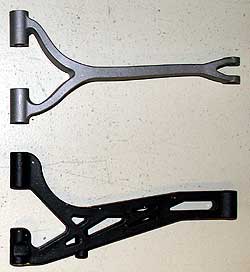
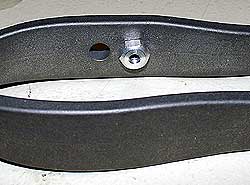
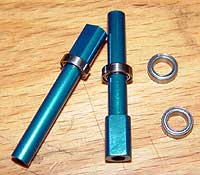
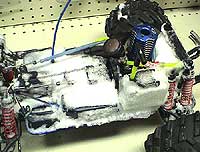
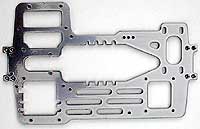
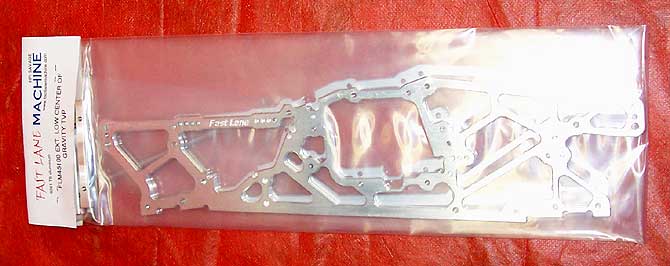
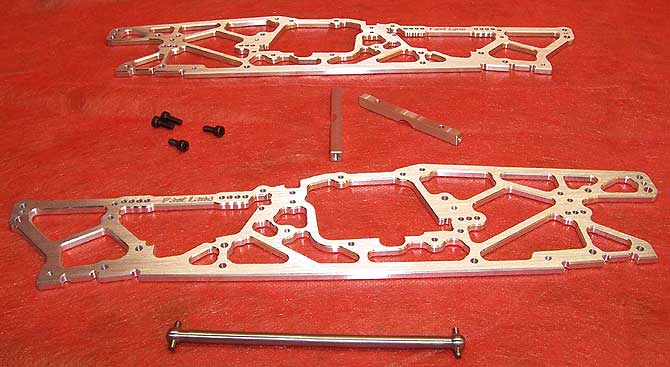
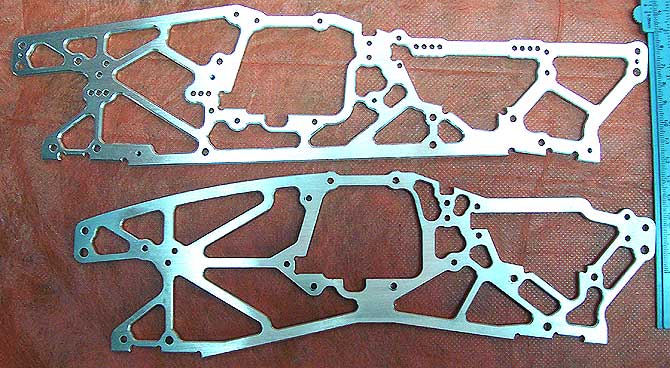
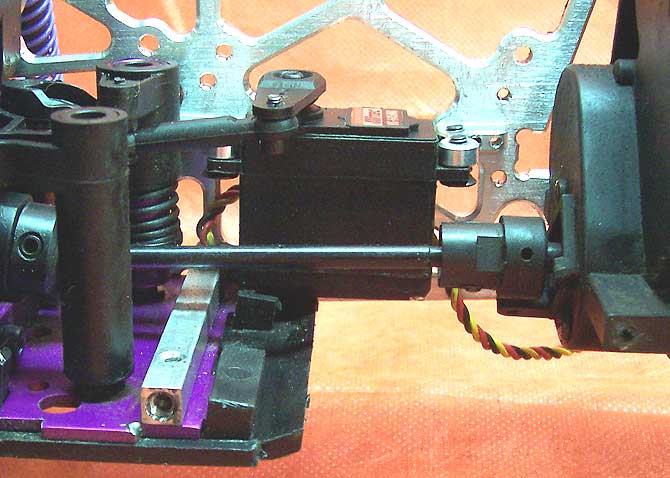
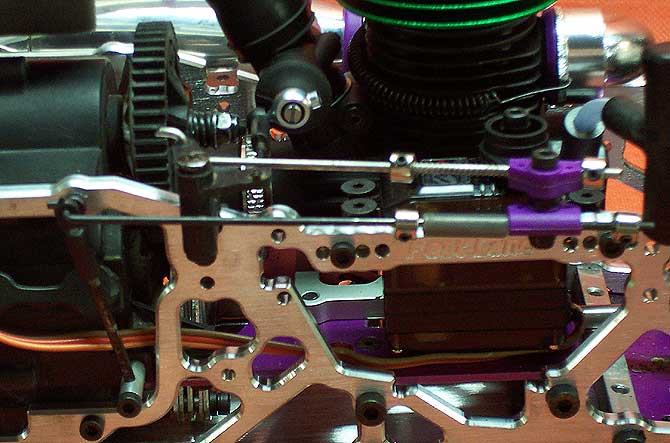
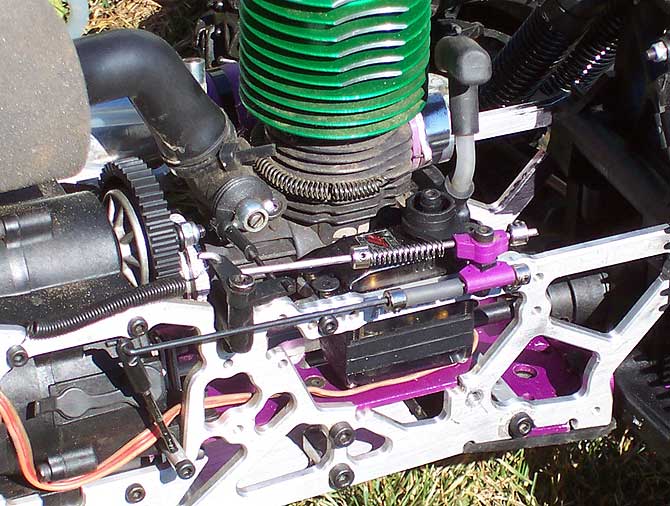
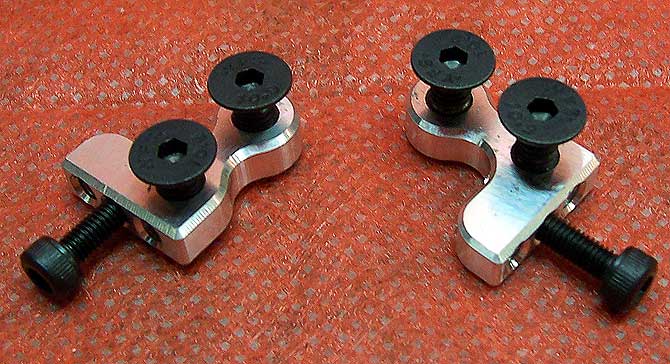
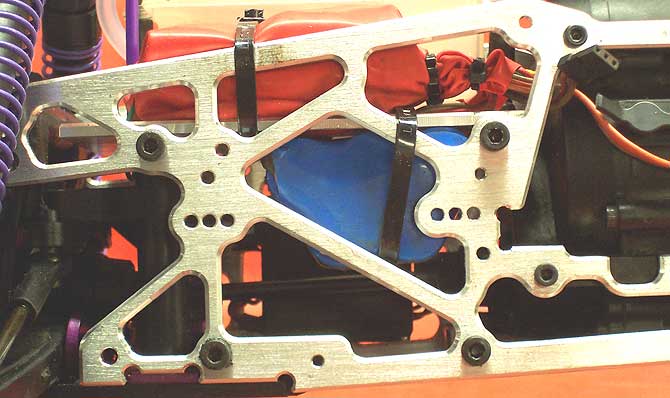
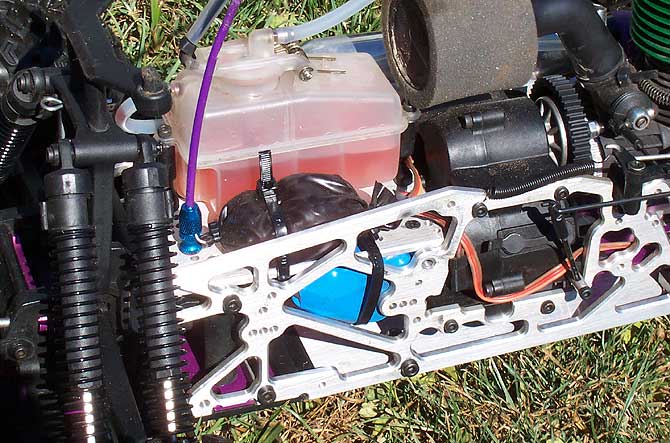
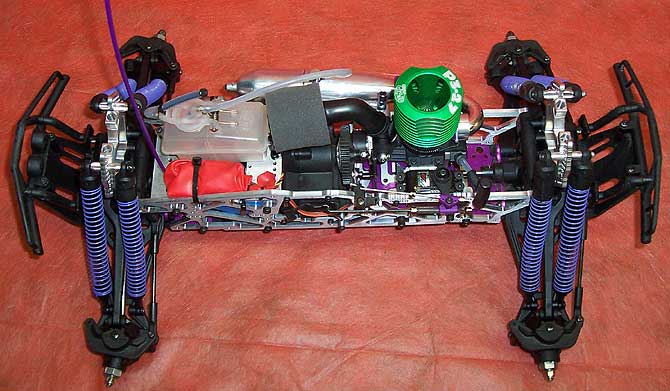
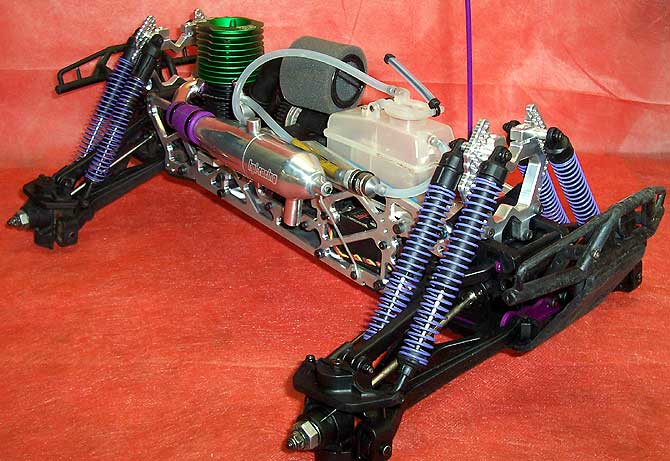
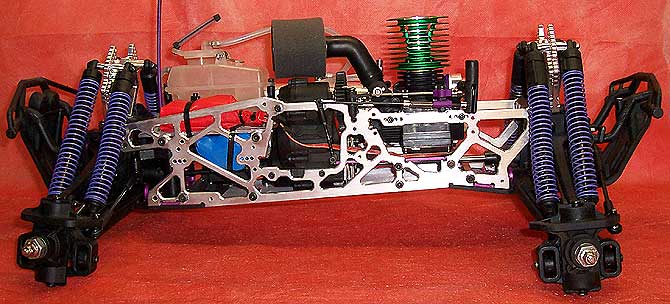
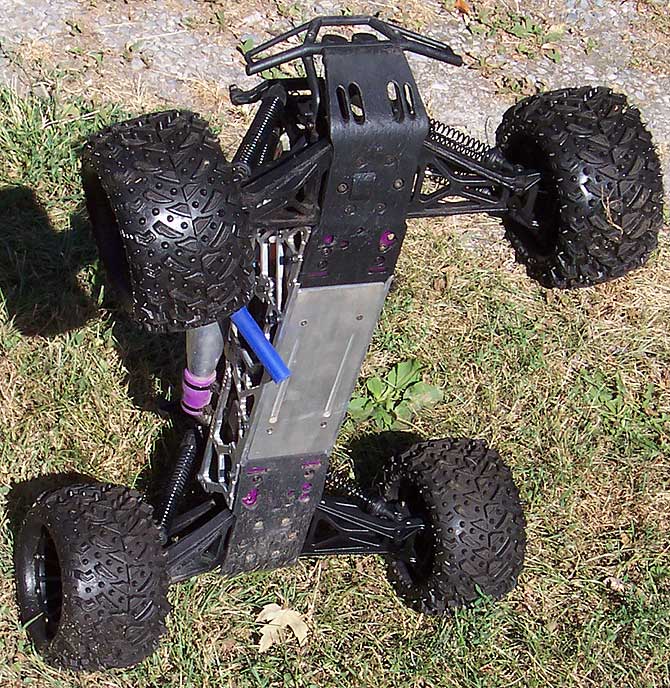
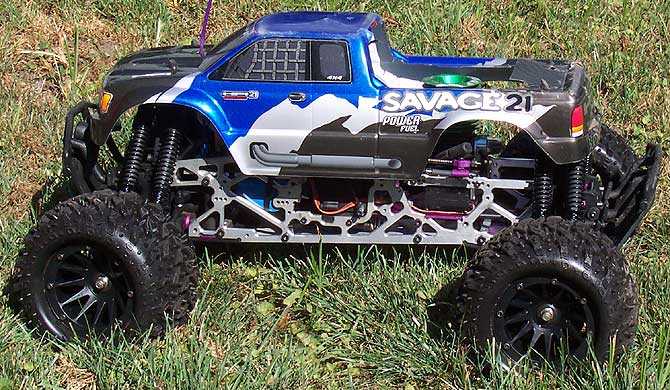
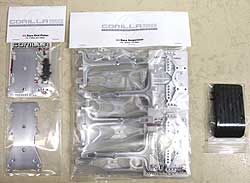
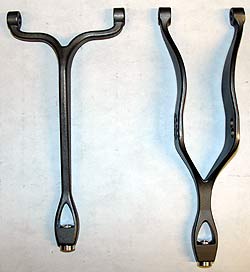
| First Impression This time I decided to do the review on FLM Savage parts because my T-Maxx was basically bullet proof and made of mostly FLM T-Maxx parts. Click here for that review. The parts I got from Fast Lane Machine were packaged nicely. I went with the new TVP’s. They designed them with a lower center of gravity and a 40mm stretch (see picture below of stock versus FLM length and design). These are teamed up with a bottom skid, servo plate/mid-tank mount, multiple position aluminum shock towers and aluminum servo mounts.
Assembly/Installation: My biggest complaint about FLM products is the fact that they come
with no pictures or instructions on how they are to be assembled.
This wouldn’t be a big deal if there were better pictures to
follow on their web site or if a lot of other people on forums already
had the parts. I started my assembly a little different then the average
user would because I had already had some modifications and was currently
trying to make a mid-tank mount. So once I got my FLM goodies I got
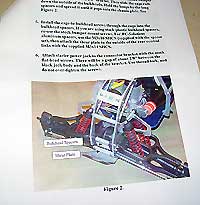
started on making my dream truck. The next step was mounting the bulkhead to the TVP’s. This
went together real nice and there was no modification needed at all.
Once I had a pile of parts that resembled a Savage, I went ahead and
mounted the factory skids up to the TVP’s and bulks. This is
where a nice trick came into play. I used the old motor mount braces
on the bottom for the skid plate braces and then used flathead screws
to secure the skids to the braces. This was a lot better then using
the stock plastic braces. So far I have got almost everything on and getting a really sick
looking Savage. I decide to work on the fuel tank mounting and location.
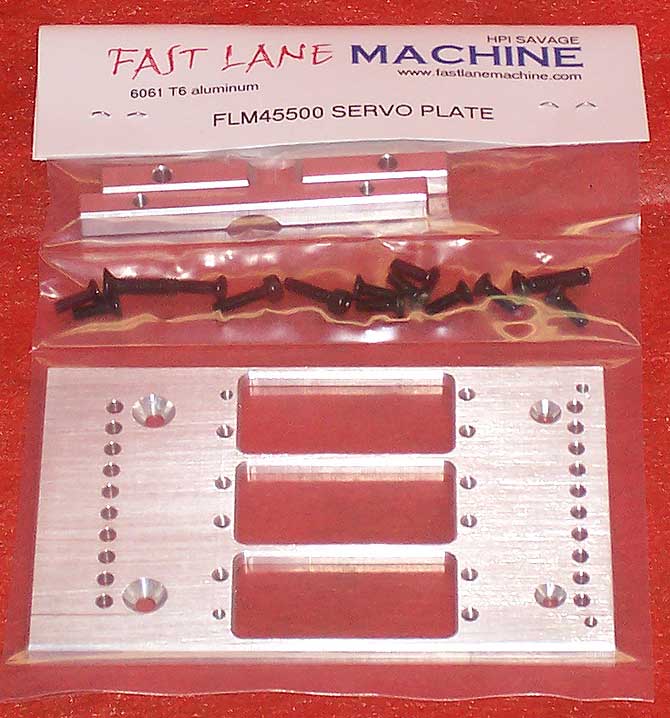
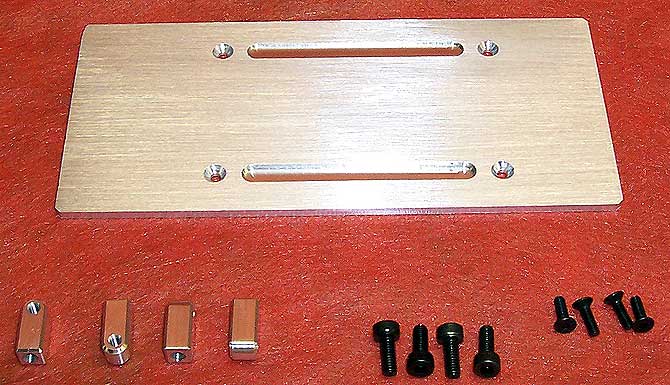
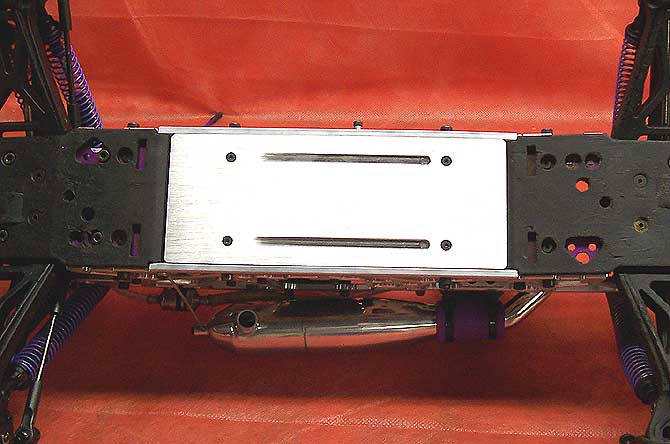
This was made very simple by Fast Lane with the servo plate that they
have made. It has 3 cut outs for servos and then many holes for mounting
a mid-tank. Now this is where I would like to have a set instruction
because it is a guessing game as to what tank will work in there and
fit the way that FLM designed the plate for. I went with an Ofna Hyper
7 buggy tank and mounts. I liked this tank because of its uniform
shape and the nice size it has. I also like the stock mounts because
they allow for flex. I had to trim the mounts up just a hair to make
them fit in the holes and be screwed down. Now I could have just taken
the mount peg off the bottom of the tank mounts and they would have
screwed right in, but I like the idea of them not turning at all.
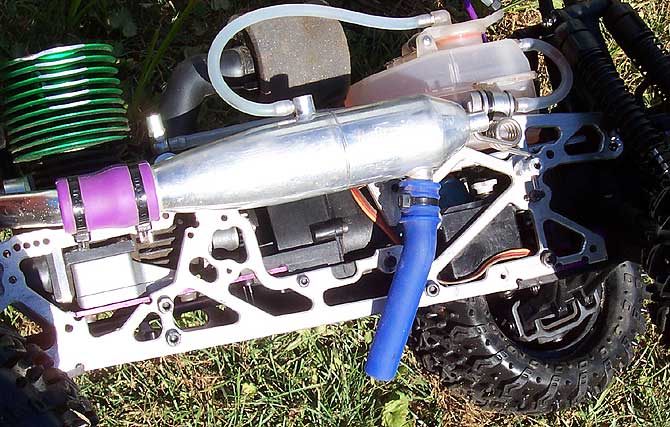
Performance / Testing Time Like always, I went out to put her through the ringer. After breaking
in the Picco .27 that is teamed up to a HPI 3-speed I was ready for
anything and everything. I got to make some runs around town here
a little and then after breaking nothing I decided I needed a roll
cage before I got to crazy and broke my engine case. Finally I have
a cage that I am happy with and it is mounted to the TVP’s in
the stronger spots where m4 bolts are used. The Verdict Fast Lane Machine makes some wonderful products. I will give them
a lot of credit for that. I do think some things are lacking in the
research and development areas but I can say that when people approach
them about issues with products they are not ignored and most of the
time improvements are made. I do have some complaints about FLM customer
service because I also dealt with them for a friend about his TVP’s.
He got the same style of TVP’s as I did and had some header
fitment issues and worries about a weak looking area on the TVP’s.
After some run time, he did break the plates in the spot of worry
and sent them in for replacement. After 3 weeks of nothing, I took
the matter into my hands and called there and was told by FLM that
the main person had some personal problems and she apologized deeply
and would send them out ASAP. This was ok by him because he is very
understanding, but on top of her apologies she also offered a free
gift because of the delay. Now that would make anybody’s day.
Within 3 days he had his pieces and was back on the road with a new
and revised TVP plates along with his free skid! So overall I am very satisfied with the wonderful products that they
are making for us. I also think that they have great customer service,
but they just need to have better communication inside the shop between
front desk and shipping and machining. I would never hesitate to order
any products from FLM and with the abuse warranty they offer you can
never go wrong. Please check out these or any of the other Fast Lane
Machine products. I have used their Traxxas T-maxx parts and now the
HPI Savage items and I will continue to abuse and Beat My Truck till
I can’t do it any longer.
NOTE FROM THE EDITOR:
Review written by "N8", BYT Forum Moderator and BYT Web
Site Contributor. N8 is a resident RC expert here at BYT and has been
a long time member and supporter. Thanks for the great write-up N8!
|
||||||||||
| |
RATING: |
|
|
||||||||||||||
| |
RATING: |
|
|
||||||||||||||
| |
RATING: |
 |
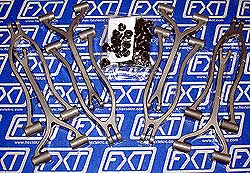
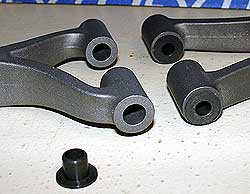
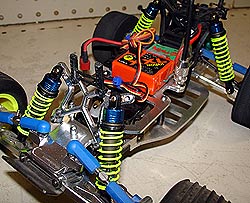
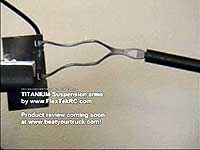
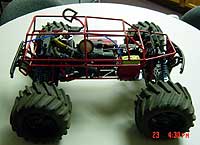
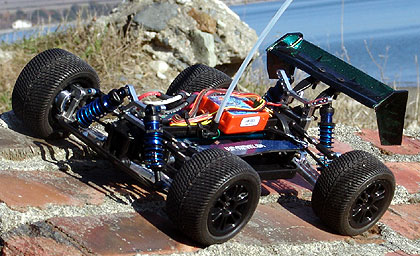
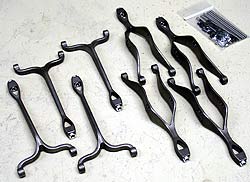
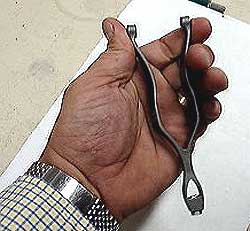
By now most of you have heard about FlexTek and their industry shaking titanium arms. Hopefully you have read our review on the T-Maxx arms? No? Well what in the world have you been doing with yourself?! Wake up! In a hobby where bigger and tougher is king, what could be better than titanium suspension arms? Absolutely nothing! When FlexTek informed us several months ago that they would be producing arms for the weak limbed LST, we were as excited as 5 year olds on Christmas morning. Heck! Santa never brought us anything this cool! Finally the long awaited day arrived and our LST arms arrived. BYT was honored to receive one of the very first sets ever produced. After all, when you are making titanium parts and want them tested in front of the RC world, who better to turn to than Beat Your Truck! FIRST IMPRESSION Our first impression was WOW WOW WOW! These suckers are thick! The T-Maxx arms we reviewed were much thinner in design. FXT designed these arms from the ground up. They are not a company that just creates knock-offs of the plastic parts they replace. They start with a clean sheet, designing components based upon the vehicle as well as the material they are working with. The LST is completely different truck than any other on the market with very different needs. Something special was required to take care of the eggshell arm problem and it looks like FlexTek is right on target. Thick, meaty, heavy-duty titanium suspension arms. Ahhhhh….just what the doctor ordered! The packaging is excellent and none of the parts are able to muck each other up on their journey to you. INSTALLATION FlexTek includes all the necessary goodies for installation however it should be noted that they are not including the Lunsford titanium hinge pins like they do with the T-Maxx arms. This is not a big deal to us as we already had the Lunsford hinge pins and turnbuckles on our LST. In our situation, it would have sucked to have to buy them again when we already paid for them once! Are they required for this kit? No. Are Lunsford hinge pins recommended for the serious basher? Duh! Of course they are. Again, they are not required. Every component of the kit installed perfectly. No interference problems anywhere. The upper arms have a “funky” bend in them that does not look “right” until you install them. Once they are installed, you will notice how they curve beautifully around the massive LST shocks. The lower shock mounts are very nice and feature a design that allows for a wrench to be used while tightening (your going to want to use some medium strength thread locker on the lower shock screws). We suggested this “mount with hex nut” feature on the lower mounts to FXT when we reviewed the T-Maxx arms and they definitely listened. Each arm requires several high density plastic inserts wherever a hinge pin passes through them. FXT was kind enough to include some extra inserts so if you start to see some wear over time, you will be ready with some replacements. They fit very snug and will not come out of place. Use a set of pliers to gently squeeze them into position. These inserts are what the hinge pins pivot on. Using a high density plastic keeps everything moving smoothly, much smoother than running directly against the titanium arms themselves. QUALITY Every part of the kit looks excellent. The aluminum lower shock mounts and the very snug fitting arm inserts fit the arms perfectly. The casting looks great; in fact it seems to be a slight step up from the T-Maxx arms we tested a few months ago. This is the kind of kit that draws attention to a truck and sets it apart from the “other guys”. All the corners and bends are contoured very nicely, virtually eliminating stress risers which could result in a crack. PERFORMANCE We have been bashing with these arms for the past 4 weeks and it has been a complete blast! IT IS AN ABSOLUTE TREAT to finally drive our $600 LST without having to worry about arms busting at will. The sad thing is we had started to drive the LST with “kid gloves” to keep the arms from breaking. That is more than sad….it is disturbing! This is BEAT YOUR TRUCK after all! Our field testing involved a variety of terrain ranging from road thrashing to all out launch pad jumping. During our numerous outings, the LST met with many immovable objects and it was not phased. Back up and away you go! We had the BYT LST in the air more than a commercial airliner. Despite its large size and bulging belly, the LST flies very well and likes it in the air. Repeated jumps of 6’ to 10’ dealt out no ill effects to any part of the LST, other than the rims which look like they are about to crack like eggshells! Most of the chrome is flaking around the hub area on all the wheels indicating they have been flexing big time. Anyway…back to the arms! No problems at all with the arms.
The truck drove beautifully and again, it was just awesome to be
able to DRIVE this big sucker without having to worry about busted
arms!!! It is important to note that with the stock arms, we experienced
arm failures at jump heights of 4’ or less. When we were done
testing the FlexTek arms, we removed the hinge pins to see if the
arms were strong enough to have bent them. Nope! Straight as arrows.
That tells us that these arms are soaking up a lot of the stress
before it gets to the truck. That’s great news for the bulkheads,
hinge pins and chassis. FIT / FINISH Any RC newcomer checking out your LST will first see the huge shocks (that’s what everyone looks at first) and then BAM….they will see these arms and be in absolute awe. Needless to say, we really like the look of these arms in respect to the finish and the design. Kudos to the design engineers at FlexTek. The LST arm finish looks slightly “smoother” than the
T-Maxx arms we previously reviewed and according to FXT, it is due
to a shot blasting process that is performed after the casting is
done. The T-Maxx arms were "polished" in a tumbler.. Some
people may prefer the "bling" of polished aluminum however
there is no comparison when it comes to strength and durability. The value of these arms is hard to measure. Especially if you are an LST owner that is super frustrated with busting arms left and right. You have a $600 monster truck that is so special in so many ways but has a terrible weakness. Don’t give up on it! The solution to the problem is here. So what about the price? Well, we have just received some very exciting news from the FXT factory. With increased production and volume, they have been able to reduce their prices significantly. This entire titanium suspension arm package (this also goes for the T-Maxx kit) now sells for only $289.95! Up until this point, the only excuse anyone had for not buying titanium arms was “I can’t afford $400 for suspension arms”…..well, now they are less than $300! SUMMARY If you haven’t figured it out by now, we love these arms. What is not to like? They will not break, band or leave you stranded. And FlexTek guarantees that they will not break! How many manufacturers give you that kind of guarantee? Not many…..in fact none that we can think of. The only obstacle that FXT has had thus far is the price of their goods. Now with their new aggressive pricing, that is not a factor anymore. So you’re an LST owner? What are you waiting for? It’s time to beat your truck and the only way to do it with an LST is with a set of these unbreakable titanium suspension arms. Check out the FlexTek RC web site and learn more about these killer arms and the other products that are coming soon! Tell them that the guys at Beat Your Truck sent you! One last noteworthy item: Per the FlexTek
RC web site: "FlexTek RC Cast components come
with a full 30-day money back guarantee from date of the original
purchase. Items may be returned for a full refund (less any associated
freight charges) within this 30-day period. See warranty information
for details." That is a good indication of a
quality company and a quality product. This bumps us the Cost/Value
part of our review. To this writer, it makes the parts more valuable
when I know the company believes in their product enough to make
a guarantee like that. |
||||||||||||||
| |
RATING: |
|
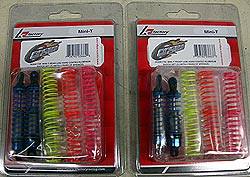
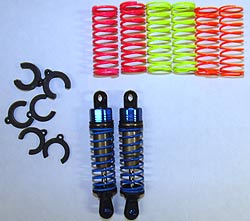
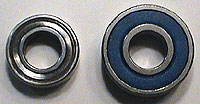
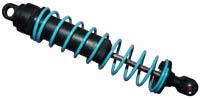
Even with the latest assault of 1/18 scale mini RC vehicles, the Mini-T is still a hot player in this category. And if you own one or have ever driven one, you understand why. One of the biggest weak points on the Mini-T is the cruddy friction shocks it comes with. Racer’s Edge to the rescue! BYT has been running the Team Losi Shock upgrade for quite some time and they have worked pretty well, except for the frequent leaks. Racer’s Edge offers a Mini-T shock set that we just had to try out. We have been bashing them for the past month or so and here’s what we found! The RE (Racer’s Edge) shocks are a top load design and the shock cap seals via an o-ring. This provides a better seal than the thin plastic washer the Losi’s use (the ones that leak all the time unless you double or triple stack them). This is a big bonus (anyone who has the Losi’s will agree).
The shocks come fully assembled for convenience however they are fully rebuildable. In fact they are built exactly like (or better than) most 1/10 and 1/8 scale shocks. The shock bodies are hard anodized for extra smooth shock action. The body has a double o-ring seal where the shock shaft exits with seal retainers and a metal retaining clip to hold everything in place. The caps have a bladder in them and the piston is held in place by an e-clip….just like 1/10 and 1/8 scale shocks. We experienced no leaks with the RE shocks during any of our testing.
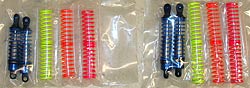
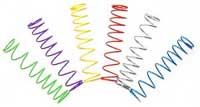
Here’s yet another killer option on this shock set – they come with lots of spring options, right out of the package! If you bought the Losi’s, you quickly found out that the only springs that come with the shocks SUCK and you had to go and drop another $16-$20 to get the spring sets. Racer’s Edge thought of everything and by including 4 (yes we said FOUR) springs for each shock. You get “softest”, “soft”, “medium” and “hard” spring options for each shock. We opted to run the “medium” springs on our setup (our Mini-T is fat with aluminum) and they feel significantly stiffer than the heavy springs from Losi! The “heavy” Racer’s Edge springs are SUPER stiff! Nice. RE really gives you a wide range of setups with the big handful of extra springs you get. Did we mention you have to pay extra for the Losi springs and RE includes them? Hmmm. That’s a no brainer isn’t it?! The RE shocks also come with a few spring spacers to further fine tune your ride height.
Once we had them installed, movement was smooth as silk. After a few weeks of banging around, the same was still true. Like we said before, no runs, no drips, no errors (that is from an old Krylon Paint TV commercial for those that are too young to know). We experienced ZERO problems with them and they performed very well at all times.
VERDICT: In our humble opinion, the RE shocks are superior to the Team Losi upgrades. We can’t really find anything wrong with the Racer's Edge shocks, especially when you consider the price (a mere $39.99 for ALL FOUR shocks). The Losi’s cost us $30+ and then we spent $18 on springs! This is an excellent value! We wish we would have bought these instead of the Losi’s. The
Losi's aren't bad by any means. We just think the Racer's Edge shocks
are better!! If you are looking for oil-filled shocks
for your Mini-T, save money and get better shocks.
Buy
the Racer’s Edge Mini-T shocks! |
||||||||||||||
| |
RATING: |
|
|
|||||||||||||||||||||||||||||
| |
RATING: |
|
 July and said they had something new for the RC world. A month
or two later, we received some top secret spy video from them showing
how extremely flexible (that’s right…we said flexible) these
cast titanium arms are. Click here to check it out! Let’s come
right out and ask! How the heck do you make titanium flex like that?! July and said they had something new for the RC world. A month
or two later, we received some top secret spy video from them showing
how extremely flexible (that’s right…we said flexible) these
cast titanium arms are. Click here to check it out! Let’s come
right out and ask! How the heck do you make titanium flex like that?!
Here’s what FlexTek had to say, “The design of the FlexTek arms is to absorb energy through deflection without transmitting energy back into the frame work or the vehicle including the hinge pins. One of the biggest questions we have is how can you make flexible suspension arms out of titanium? Answer, it is through design and having a good understanding of the unique characteristics that titanium has to offer.”
In addition to the abuse aspect, our engineers have paid close
attention to the details that will make the parts perform at their optimum.
All unnecessary material has been removed from the design to make the
parts as light as possible while maintaining an overall balance of the
part. Optimization of this nature translates to increased suspension
speed assuring better wheel to ground contact resulting in enhanced
handling.” 4. The arms feel very light and quite similar to plastic versions. FlexTek tells us they are slightly heavier than stock but are the same approximate weight as RPM arms. That's pretty impressive boys and girls especially as we are talking about TITANIUM here! |
||||||||||||||
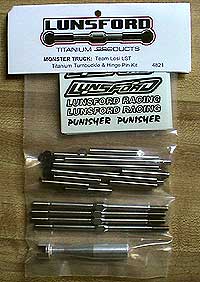
| LUNSFORD TITANIUM MONSTER KIT FOR LOSI LST (Losi Super Truck) | RATING: |
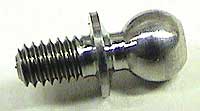
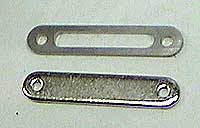
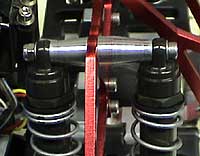
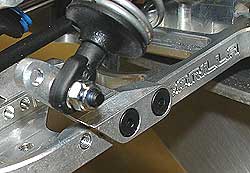
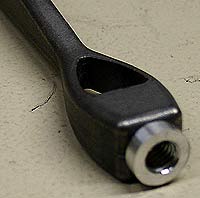
  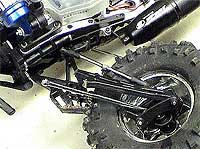 The only thing holding the tire on is the Lunsford turnbuckle! 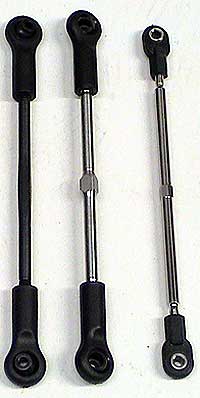 LEFT = stock LST turnbuckle CENTER = Lunsford LST turnbuckle RIGHT = Lunsford T-Maxx turnbuckle 
|
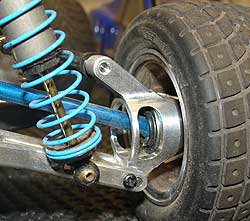
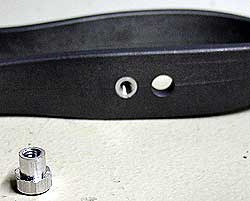
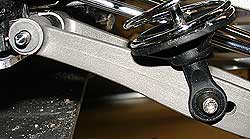
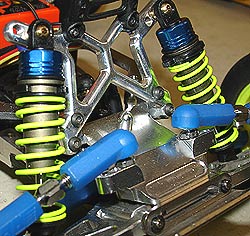
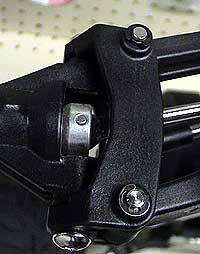
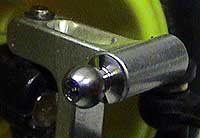
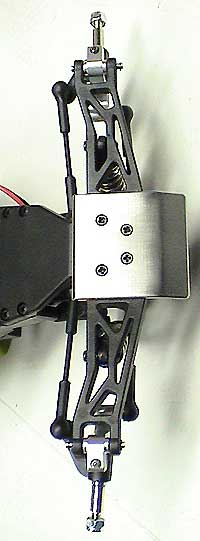
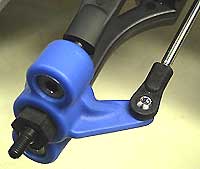
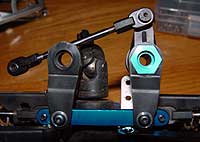
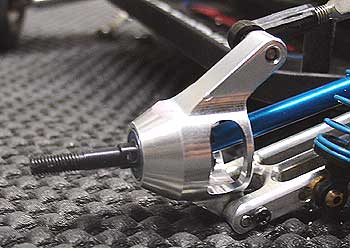
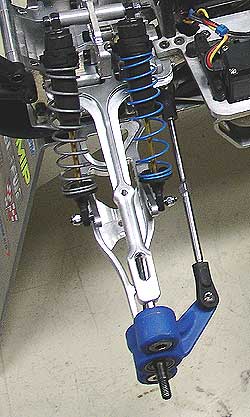
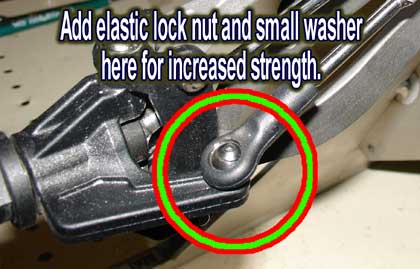
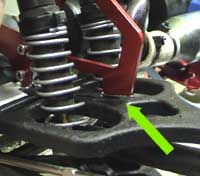
UPDATE / SETUP TIP: Since
we have installed FlexTek RC titanium suspension arms, we have
had a few crashes where the outside turnbuckle ball stud will
actually pull out of the C-hub. Add a small elastic nut to the
ball studs where they mount to the C-hubs (see picture below
- add nut to mount circled in the picture) and this will strengthen
this mount significantly. Losi should have had elastic nuts on
here from the beginning. Sadly until we install Lunsford and
FlexTek to our LST, the arms would always bust or the turnbuckles
would bend/snap before the ends even had a chance to pull out! |
||||||||||||||
| LUNSFORD TITANIUM MINI-T BALL ENDS | RATING: |
|
The fit is great and they tighten up very nicely. The stock rod ends snap on with authority (that is if your rod ends are still in good shape). The ball ends are an excellent idea if you are planning on, or have already upgraded to titanium turnbuckles. The ball studs are great and there is nothing not to love about them.
For the nice price of $12.50 retail for a set of four ball studs (less
than $40 for all twelve ball studs), you really can’t go wrong
and it is almost certain you will never, ever break a ball! The
price may seem a little bit steep until you actually see and feel the
quality of these components. |
||||||||||||||
| |
RATING: |
 |
|
||||||||||||||
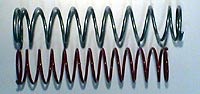
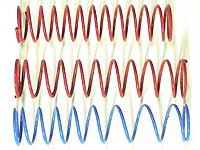
| FULLFORCE RC DUAL RATE SPRINGS - T-MAXX | RATING: |
|
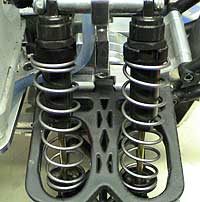
Installation is simple. Remove the bottom mounting screws, lower spring cups and slide the old spring off. Install the new spring, then the spring cup and finally fasten the lower shock mount securely. Granted you do not have to remove the entire shock for this procedure however if you have not performed maintenance on them lately, it may be a good time to pull them off and change the oil. The stock T-Maxx comes with 30wt oil. Heavier trucks and high jumpers work better with slightly heavier oils and sometimes a piston change....but that's another article. We were running 50wt Trinity oil in our Traxxas Big Bore shocks for this test. The springs look great on our truck. The dual rate coil design looks sweet and the paint on the shocks looks good also. We noticed that the diameter of the springs seems to be slightly smaller that the stockers and other springs we have tested. This shouldn’t really affect the performance or longevity of the springs as long as the tensile strength is up to par.
Check out the FullForce
RC web site to grab a set of these while you can. |
||||||||||||||
| LUNSFORD TITANIUM MONSTER SPRINGS | RATING: |
|
|
||||||||||||||
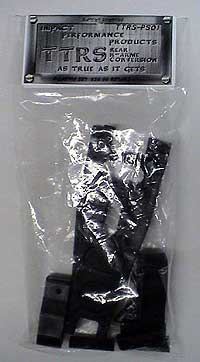
| T-MAXX - IMPACT PERFORMANCE PRODUCTS - TRUE TRACK REAR SUSPENSION | RATING: |
|
|
||||||||||||||
| T-MAXX - LUNSFORD 1/8 SCALE T-MAXX TURNBUCKLE AND HINGE PIN KIT | RATING: |
|
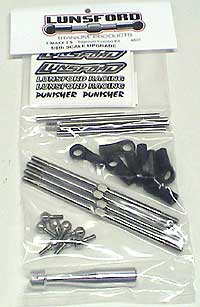
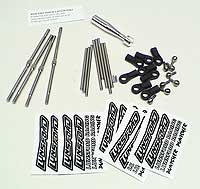
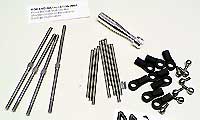
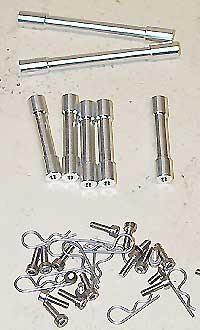
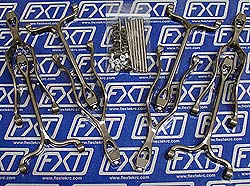
It’s a complete upgrade for the entire turnbuckle setup….rod ends, ball ends and the turnbuckles themselves. When the upgrade kit arrived, we were pleased to see that everything is nicely segregated in the package to prevent shipping scratches and the like (see picture to the left). All parts were present and accounted for so we got our work area ready and commenced to installing!
Next, it was time to install the new hinge pins. Depending on your skid plate configuration, it is sometimes easiest to remove the plates. We had been using stainless steel pins from Traxxas and they work pretty well for $12 a set. They do however bend and we are excited to see what the titanium pins will be able to take. We also had a few questions about using titanium. Will we start breaking arms? Will these pins start wearing out our aluminum bulkheads? Will this truck ever be indestructible? ?
This is the kit to buy when you are sick of replacing those weak, easy-to-bend stock turnbuckles and/or when you are looking for some detail to set your T apart from the rest of the pack. The worst thing we can say is the cost is a little bit high at $86.95 retail however when you factor in that they will probably be the last set you buy, and when you factor in everything that is included with the kit, they are truly worth every dollar. Ok....we are just nitpicking. It is a great deal. Time will be the ultimate judge of this kit and we will be sure to let you know if we have any troubles or comments as we pile the miles on this season. We doubt that we will. In fact we will probably wear out the rest of the truck and install these on the next ride. Nice job Lunsford. You have once again proved that you are the king of the titanium turnbuckle world. |
||||||||||||||
| T-MAXX UPGRADE - PROLINE MAXX STEERING UPGRADE | RATING: |

|
|
||||||||||||||
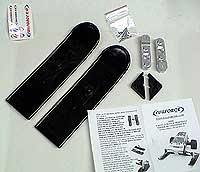
| FULLFORCE RC - SNOW SKIS | RATING: |
|
|
||||||||||||||
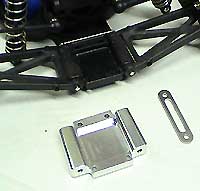
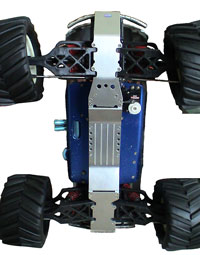
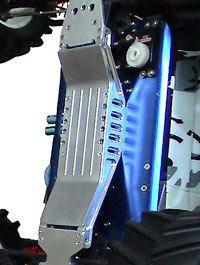
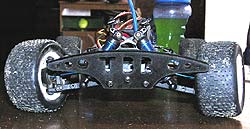
| GREAT ASSEMBLY RC - TITANIUM FRONT & REAR SKID PLATES 3MM | RATING: |

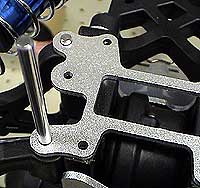
Note: the center skid shown is not GARC. We just left it on for bashing as we hate cleaning in between the chassis arms :)  Check out the access holes for the lower suspension arm pins!
 |
|
||||||||||||||
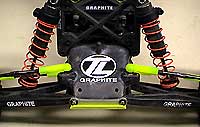
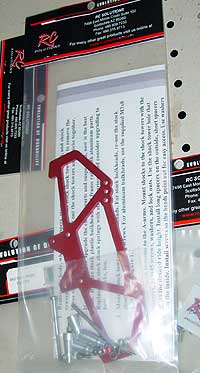
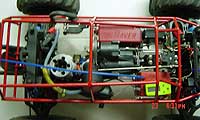
| RC Solutions - Shock Towers, Roll Cage and Skid Plates | RATING: |
 |
|
||||||||||||||||||||||||||||||||||||||||||
| RPM Axle Carriers - T-Maxx | RATING: |
 |
|
||||||||||||||
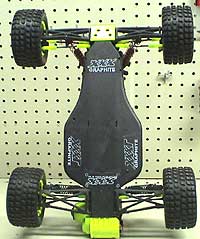
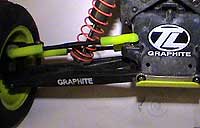
| TEAM LOSI - XXX-T GRAPHITE, GRAPHITE, GRAPHITE and MORE GRAPHITE | RATING: tba |
|
|
Visit the TEAM LOSI web site. |
||||||||||||||
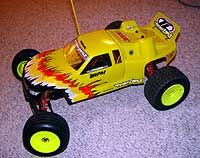
| TEAM LOSI - XXX-T RTR SPORT 2WD ELECTRIC TRUCK | RATING: |
|
Visit the TEAM LOSI web site. WHAT AN AWESOME TRUCK!!! We have already added a new Trinity motor (see review below), tons of graphite, new meats, changed the shock oil, upgraded the rear springs and done some re-wiring / soldering :) The truck has been fabulous so far. It offers a ton of adjustability and is a jumping fool! It also comes with a JR controller and bearings throughout. Those features alone put it ahead of most of the other RTR trucks in its class. Check out out Project XXX-T for more details! |
||||||||||||||
| XXX-T UPGRADE - RPM Rod Ends | RATING: |
|
|
||||||||||||||
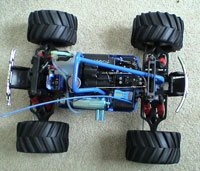
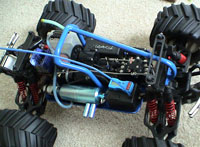
| T-MAXX UPGRADE - FullForce RC Spider Racing Chassis | RATING: |
  
|
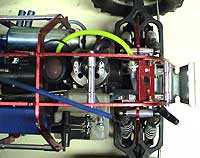
Installation is a breeze. We simply removed the front and rear suspension/bulkhead assemblies from the truck. Next, we pulled all the goodies off of the old chassis. We were able to save time by leaving the electronics assembled and removing them as a complete unit. No need to unhook the servos from the receiver etc. All the holes that need to be recessed are recessed. All the holes that should be slotted are slotted. FullForce also includes some longer, black oxide 12.9 alloy screws (did we mention this thing is super thick) to deal with the new girth of the chassis. A very nice touch indeed. 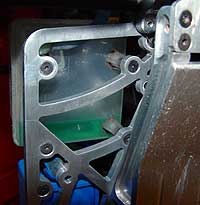 The name "Spider" obviously comes from it's look. The amount of extra material that is machined out of this chassis is amazing. It is incredibly lightweight, weighing in at only 5.3 oz (2 oz lighter than the stock chassis). It was designed for the new 2.5 but installs perfectly on the original style T-Maxx (that's what we installed ours on). The name "Spider" obviously comes from it's look. The amount of extra material that is machined out of this chassis is amazing. It is incredibly lightweight, weighing in at only 5.3 oz (2 oz lighter than the stock chassis). It was designed for the new 2.5 but installs perfectly on the original style T-Maxx (that's what we installed ours on).We put it through some nasty crashes with no ill effects. It is SO much stronger than the stock chassis it's not even funny. In fact the stocker looks like it is paper thin compared to this bad boy. You can feel the quality and strength as soon as you pick it up. Extra bonus: It is predrilled for the FFRC roll bar AND has an extra wide area for a double disc brake setup. Are you looking for a tough, lightweight and sweet looking chassis upgrade? Are you interested in ticking off your pals by having a WAY cooler chassis than theirs? Your search is over. This is the chassis for you. We can't imagine how anyone would be disappointed with this product. And at $85, your wallet will be happy too! Visit the Full Force RC web site to get your own Spider chassis! |
||||||||||||||
| T-MAXX UPGRADE - RC RAVEN Full Roll Cage - SUV style | RATING: |
|
|
||||||||||||||
| T-MAXX UPGRADE - RC RAVEN Chrome Chassis | RATING: |
|
|
||||||||||||||
| T-MAXX UPGRADE - RC RAVEN Body Posts | RATING: |

|
Note: The posts for the rear of the truck do not feature the same body clip insertion points...meaning, after you install them your body clips will go in from the side (opposite from stock - same insertion direction as the front posts). Make sure this will not cause any problems with your body shell! |
||||||||||||||
| T-MAXX UPGRADE - Full Force Shock Boots | RATING: |
|
|
Installation is simple. We simply removed the lower shock mount and removed the springs. We then (twisted) the sock/boot over the spring. Once it was in place, we tucked the excess inside the spring. Once they were reinstalled, the spring tension kept the boot in place! It doesn't get much easier than that. After a severe amount of dirt had accumulated on them we pulled them off and washed them in the sink. They washed very well and looked like new again. If you are running upgraded aluminum shocks and want to protect that investment, these are the way to go. They are priced right at only $12 for a set of eight boots!!! The fact they kept our shocks protected AND are offered at a great price earns them the 5 star rating. Did we mention they look cool too? They will fit on almost any RC vehicle including stadium trucks and 1/8th scale buggies and are triple stitched for durability. Nice job Full Force! Visit the Full Force RC web site to get a set of these booties for your ride. |
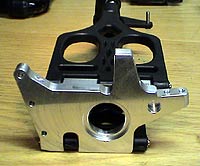
| T-MAXX UPGRADE - Great Assembly RC 6061 Aluminum Bulk Heads | RATING: |
|
|
When we received our 6061 Aluminum Bulkheads and Braces package from Great Assembly RC, we were nothing short of impressed. The kit includes all of the hardware needed along with super meaty aluminum bulkhead braces. The bulkhead set was packaged very nicely and installation was a treat. Everything lined up beautifully. The machine work is quite nice. There are access holes machined into the bulks to make tightening the lower shock tower bolts very easy. THIS IS A GREAT FEATURE!! Way to go Great Assembly RC! The kit includes an excellent set of bulkhead braces. Constructed of solid aluminum and beefy in size to say the least. It also includes a rear link brace. To say the least, this is a very complete kit with nice added features compared to the stock setup and also when compared to many other aftermarket bulkhead sets. All we can say is if the 6061's are this good, the 7075's must be off the charts! Visit the Great Assembly RC web site to get your hands on a set of these and other great items. |
| T-MAXX UPGRADE - RC Raven Dual Rate Springs | RATING: |
|
|
| T-MAXX UPGRADE - RC Raven Aluminum Shock Towers | RATING: |
|
|
After several (20+) nasty landings (many of which were upside down), we did manage to put a slight (very slight) bend in one of the rear shock towers. It was easily straightened. Let us stress... we were being VERY VERY hard on the truck and purposely landing it on anything but the wheels (the stock "Old Blue" body is in really bad shape after all of this). We recommend these towers to anyone who wants to add some adjustability to their suspension. Not to mention they are awesome looking! Visit the RC Raven web site. |
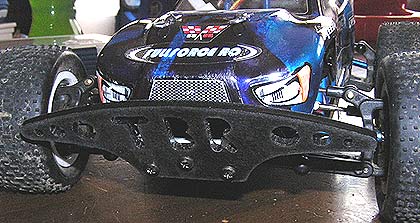
| T-MAXX UPGRADE - RC Raven Aluminum Bumpers | RATING: |
|
|
These bumpers worked great. Bonus... the grass and mud stains cleaned off easily at the end of each day. They were a little rough when we received them. We needed to remove some of the excess material around the inside edges of the bumper and the corners. Not a big deal especially for the price and the performance. Visit the RC Raven web site. |
| T-MAXX UPGRADE - Full Force Aluminum Roll Bar | RATING: |
|
|
We have used other roll bars that bolt into the bulkheads etc and they work well also. However the FullForceRC roll bar is lighter in weight than others we have used and that's a bonus, especially when we have added some weight with all the aluminum goodies on the truck. It is inexpensive and good cooling head/engine protection!!! We are running a Dynamite Ultra Performance head on the truck and the bar is higher than the head (see the picture to the left). If you are running a larger (taller) cooling head than this, you might wish the roll bar was slightly higher for additional protection. Visit the Full Force RC web site. |
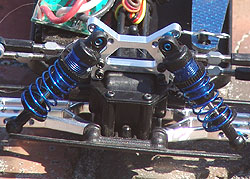
| T-MAXX UPGRADE - Traxxas Big Bore Shocks | RATING: |
|
|
The only thing we would change with this setup is moving to heavier weight oil in the shocks. We have been told the Big Bores come with 30 weight oil in the package. This may be a personal preference but we think a heavier weight shock oil would make for a better driving truck and stiffen things up a bit. This is a GREAT upgrade and worked very well with the springs we tested them with (RC Raven Dual Rate Springs - see review above) . Visit the Traxxas web site for more information. |
| T-MAXX UPGRADE - RC RAVEN ALUMINUM SERVO PROTECTOR | RATING: |
 |
The protector is very lightweight and mounting it up was easy. RC Raven included new allen head screws for the job. Nice touch! After securing it to the chassis, we took the truck out and gave it a huge pounding in dirt, gravel and rock piles. It held up extremely well and did its job without any trouble. The price is right (about $20) and if it saves your servo once (especially a upgraded high dollar servo), it paid for itself. If you beat your truck, this is an excellent item to own. Visit RC Ravens web
site to learn more about this and other great products. |
| T-MAXX UPGRADE - TRINITY HEAVY SPRINGS (BLUE) | RATING: |
 |
Our LHS guy was right. After running the truck extensively over rough terrain and over some serious jumps, we were sold on these springs. They eliminated the "crack" of impact on all but the really big jumps. We found that on our truck, they worked best with no spacers. The only fault we found with the springs was a marginal paint job (minus one star). And that could just be the set we purchased? Other than that, they are great. Trinity makes a wide variety of springs for your driving needs. Visit Trinity's web site for more info!. |
| T-MAXX UPGRADE - NEW ERA THREE POINT ROLL BAR | RATING: |
  |
 Last
year I took a big chunk out of my OS cylinder head during a truck beating.
Not a good deal. I am also getting sick of smashing my truck body into
little pieces. It's time for some truck protection. This three point roll
bar by New Era
installs quick and utilizes some seriously thick steel tube. It is surprisingly
lightweight even though it is made from steel! Last
year I took a big chunk out of my OS cylinder head during a truck beating.
Not a good deal. I am also getting sick of smashing my truck body into
little pieces. It's time for some truck protection. This three point roll
bar by New Era
installs quick and utilizes some seriously thick steel tube. It is surprisingly
lightweight even though it is made from steel! A great item especially for the price ($35).The only drawback we see (or thought we saw) was that it bolts into the front shock tower. We initially thought this would be a problem however after NUMEROUS beatings, it has held up very well. Shows what we know! :) It fits nicely inside the truck body. We adjusted our body to fit snug against the bar to give the cab more strength in roll over's. So far this has proven to be a good move. Visit the New Era web site to learn more about this roll bar and other products. |
| T-MAXX UPGRADE - NEW ERA ALUMINUM FRONT, REAR AND CENTER SKID PLATES | RATING: |
 |
After
replacing about 6 sets of plastic skid plates, it's time for a set of aluminum skids. These skids go for about $46 for the complete set of three
skids. Certainly a deal! Note the extra long center skid that runs the complete distance between the front and rear skids. This kit was the same price as other kits with smaller center skid plates! All the skid plates fit well however we opted to have the front and rear plates bent inward (to about a 58 degree angle) to put them behind the bumpers for additional protection (note the pics at the left with the skids protruding past the bumpers - this is the original setup - pictures coming soon of the modifications to the plates). The rear plate was machined to fit inside the rear bumper mounts. This work was professionally done by a friend and master metal smith (thanks Kevlar). Money well spent! We wish there were more access holes drilled into the plates (engine mounts, etc, minus 1 star). Not a big deal though. Visit the New Era web site to learn more about these skid plates and other products. |
| T-MAXX UPGRADE - RC ROCKET ALUMINUM CHASSIS BRACES | RATING: |
 |
We give these a big BYT thumbs up. |
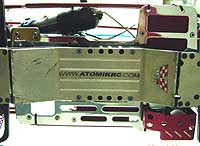
| T-MAXX UPGRADE - ATOMIK BODIES | RATING: |
  |
Money well spent! We will keep you up to date on how it holds up as the beating season progresses. Visit the Atomik web site to learn more about their line of truck bodies. |
| T-MAXX UPGRADE - PRO-LINE WIDE MAXX SUSPENSION | RATING: |
 |
The Pro-Line suspension kit has added 1 inch to the overall width of the truck. If you have the means, we highly recommend this kit. It just may be our overall favorite hop-up to date. We have run over 8 gallons of fuel through our trucks with this kit and have loved every minute of it. Visit the Pro-Line web site to learn more about this awesome suspension package. Note: The picture shows the Pro-Line kit with offset StableMaxx RPM Monster Clawz rims. |
| T-MAXX UPGRADE - RPM MONSTER CLAW OFFSET WHEELS | RATING: |
 |
Extra bonus....the RPM wheels are supposed to be some of, if not the lightest wheels, you can get for the T-Maxx. That means more power is put to the ground, not absorbed in heavy wheels. We like these rims. They are super tough and are an excellent alternative to the Pro-Line Wide Suspension. Check out the RPM web site to learn more about these wheels. |
| T-MAXX UPGRADE - PRO-LINE ROAD RAGE TIRES | RATING: |
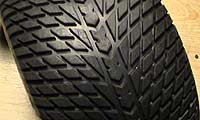 |
Visit the Pro-Line web site to learn more about these tires. |
 INSTALLATION
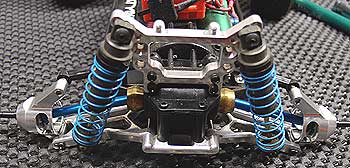

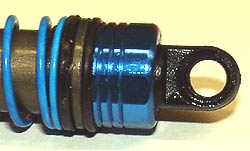 Another sweet feature on the RE shocks is the top cap itself, it is
blue anodized aluminum and really adds some extra “bling” to the
package. Not only do they look good but aluminum shock caps are also
less likely to flex and pop off during big landings (Losi shocks have a plastic cap). The top shock
mount that protrudes from the cap is plastic. A note for those of you
who are running Losi aluminum shocks right now and are going to make
the switch like we did…you will need to dig through your spare
parts box, locate and install the original gold colored ball pivots
to mount the top of the shock. We found that with our aluminum tower,
the threads were slightly different and we had to really ease the top
pivots into place. None of this matters if you are still running the
stock shock and tower setup…it is a direct fit.
Another sweet feature on the RE shocks is the top cap itself, it is
blue anodized aluminum and really adds some extra “bling” to the
package. Not only do they look good but aluminum shock caps are also
less likely to flex and pop off during big landings (Losi shocks have a plastic cap). The top shock
mount that protrudes from the cap is plastic. A note for those of you
who are running Losi aluminum shocks right now and are going to make
the switch like we did…you will need to dig through your spare
parts box, locate and install the original gold colored ball pivots
to mount the top of the shock. We found that with our aluminum tower,
the threads were slightly different and we had to really ease the top
pivots into place. None of this matters if you are still running the
stock shock and tower setup…it is a direct fit. 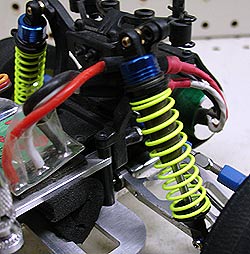 Side
note: Our kit came with oil already in the shocks however the
Side
note: Our kit came with oil already in the shocks however the
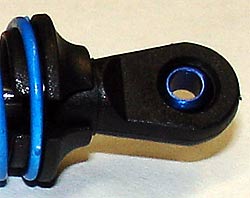 A small, but notable feature on the RE shocks is that the lower pivot
ball (inside the lower shock end) is also anodized blue. Granted once
everything is bolted together, it is hard to see but we still like
it! It is a nice extra touch.
A small, but notable feature on the RE shocks is that the lower pivot
ball (inside the lower shock end) is also anodized blue. Granted once
everything is bolted together, it is hard to see but we still like
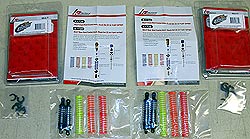
it! It is a nice extra touch. 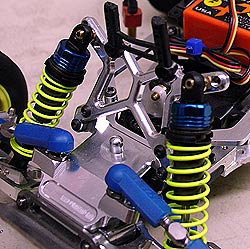 Also included with the shocks is a fill color parts list showing all
the individual components of the shock in an exploded view along with
parts numbers should they ever need a rebuild or repair. It is handy
to keep around as it also shows the springs and what color equals what
stiffness.
Also included with the shocks is a fill color parts list showing all
the individual components of the shock in an exploded view along with
parts numbers should they ever need a rebuild or repair. It is handy
to keep around as it also shows the springs and what color equals what
stiffness. 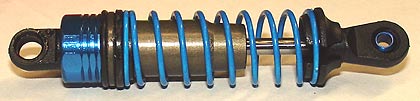


 QUALITY
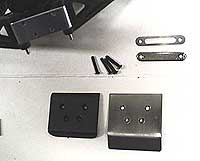
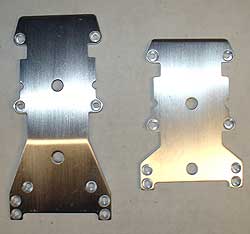 G2 RACE SKIDS: GM included a set of their trick G2 race skids for us to try as well. the G2 kit includes: (1) front skid, (1) rear skid, fasteners, and decals (man we really like these decals). As you can see by the pictures, the skids are trimmed for maximum weight reduction while still protecting the vitals.
 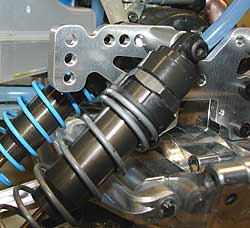 The finish is a natural aluminum and has a nice, medium shine to it. A couple of minutes with the Dremel and a polishing wheel and they would shine like chrome. The finish is uniform, we found no burrs and the threads were all tapped perfectly.
 FIRST
IMPRESSIONS
FIRST
IMPRESSIONS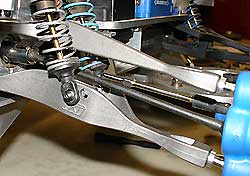 I must say that through the entire product review process, the guys
at FlexTek have really shown us that they are serious about what they
do. As you can see by looking at the arms, they are not a copy of anything
else on the market. It is truly a ground up design. The geometry of
their designs make the most of the unique properties of the titanium.
Here’s a quote from the
I must say that through the entire product review process, the guys
at FlexTek have really shown us that they are serious about what they
do. As you can see by looking at the arms, they are not a copy of anything
else on the market. It is truly a ground up design. The geometry of
their designs make the most of the unique properties of the titanium.
Here’s a quote from the 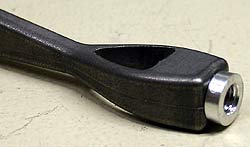 1. The arms feature threaded metal inserts where the pillow balls screw in. These inserts look great and really work well. Our pillow balls threaded very nicely into place. We recommend applying some blue, medium strength thread locker (Loctite) to keep them from spinning and coming out of adjustment.
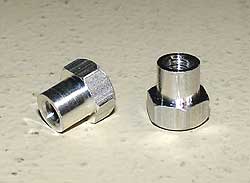
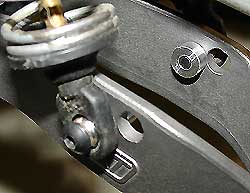 3. The threaded lower shock mounting bushings are aluminum and look great. Nice and shiny with well tapped, clean threads. They exist to give the shock mounting screw a place to thread into and attach to the arm. They work as a bushing and a nut. The bushings we received were round on the back side and that made it hard to grab onto to tighten things down. We thought it would have been better to have "flats" where you could use a wrench to hold them from spinning while tightening the shock screws. Not a big deal but a minor annoyance. Again we tossed our idea at FlexTek and they jumped right on it! As I am typing this review, they have new, hex sided bushings they are working on for final production. Talk about listening to you customers! Very impressive.You are going to want to use thread locker here also to keep everything in place.
 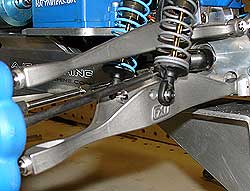 FIT / FINISH / APPEARANCE
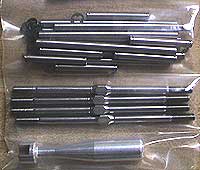 PACKAGING
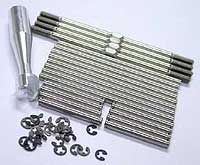 QUALITY
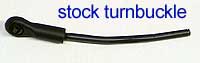
 Let’s
take a look at their titanium ball studs. They come in packs of four
and you will need three packs to get the turnbuckles taken care of.
Four ball studs on the rear and eight on the front end. Man, these are
super small! It is amazing how small they are but even more amazing
is how great they look. They are perfectly made and this is a marvel
in itself when you consider the size. The quality of Lunsford’s
machining equipment is evident when you look at parts this perfect and
this small in size. They are very impressive to say the least.
Let’s
take a look at their titanium ball studs. They come in packs of four
and you will need three packs to get the turnbuckles taken care of.
Four ball studs on the rear and eight on the front end. Man, these are
super small! It is amazing how small they are but even more amazing
is how great they look. They are perfectly made and this is a marvel
in itself when you consider the size. The quality of Lunsford’s
machining equipment is evident when you look at parts this perfect and
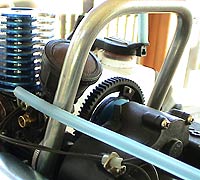
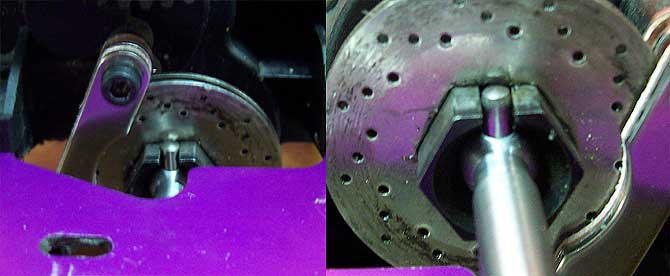
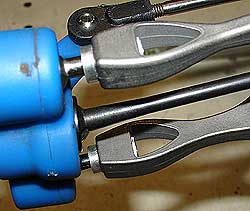
this small in size. They are very impressive to say the least.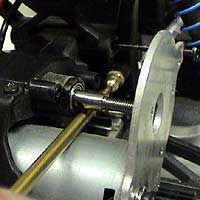 Installation
is a breeze, at least on 11 of the 12 balls. You will have to do a little
extra work to replace the rear ball stud near the spur gear. We had
to remove the motor plate almost entirely to get access to that one
(note: if you are thinking about installing a new motor or motor plate,
this is a great time to do it). See photo to the right for a sneaky
way to get your wrench at that ball stud by the gear without totally
removing the motor and motor plate. All in all, the entire job
is a quick one.
Installation
is a breeze, at least on 11 of the 12 balls. You will have to do a little
extra work to replace the rear ball stud near the spur gear. We had
to remove the motor plate almost entirely to get access to that one
(note: if you are thinking about installing a new motor or motor plate,
this is a great time to do it). See photo to the right for a sneaky
way to get your wrench at that ball stud by the gear without totally
removing the motor and motor plate. All in all, the entire job
is a quick one. 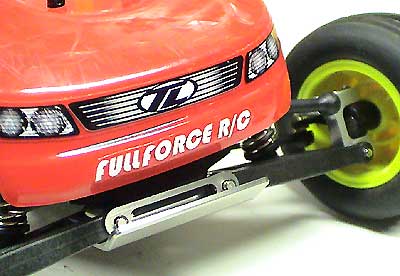
 INSTALLATION & REVIEW - FRONT END
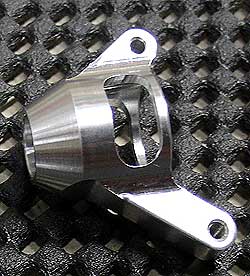
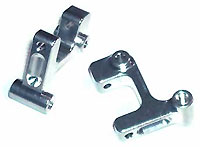
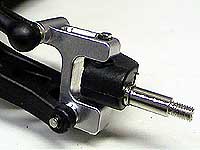
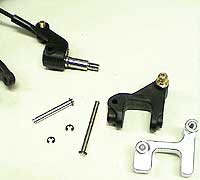 Leave the tires off for now and let's install the front C-hubs. Man are these ever sweet! The detail is great, all the way down to the nice smooth edges and threaded holes for the turnbuckle balls to screw into. DIsassemble the front spindle area as shown in the picture to the right. Note that you do not have to remove the steering turnbuckle ball end from the plastic spindle. If you can avoid popping these on and off, it is a good thing. Once you take them off, they seem to come off easier in impacts etc. We used the tip of a hobby knife to pry off the SUPER small e-clips. Take your time and try hard not to loose them. In fact it might be a good idea to have a couple of extra on hand just in case. Swap the threaded ball end from the old plastic c-hub onto the new aluminum piece. Also note that there is not a "right" or "left" c-hub. It just depends on how you mount it. Put everything back into place being sure that everything moves freely with no binding.
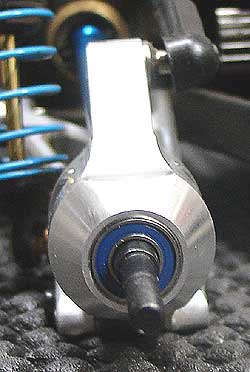
 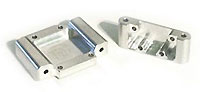 When reinstalling the itsy bitsy e-clips, it is best to take your time and just use your fingernail to pop them back into place. Anything more than that is not necessary and you will stand a good chance of bending them (but that's ok...you have extras right?). If you are having trouble installing the vertical pin, check the axle. It has a hole in it that the pin must go through. The FFRC C-hubs fit beautifully and are WAY stronger than the stock plastic setup. All the corners have nice radiuses which eliminates stress points (weak spots). You would have a difficult time dealing out any hurt to these hubs. Very, very nice stuff.
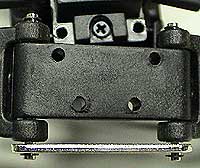 OK...onto the titanium front skid plate, front hinge pin brace and aluminum front pivot block. The skid is an easy one. Remove the four screws and just set them aside for now. Do whatever you want with the plastic skid....it's probably not worth the trouble to put it on E-bay :) With the front skid plate off, the plastic front pivot block will also be loose. Remove the hinge pins, install the pivot block and titanium hinge pin brace. The FFRC stuff fits really well. No problems at all getting anything to line up or screw into place. This is always a welcome feature as it saves mass amounts of aggravation trying to make something "new and improved" fit into your truck.
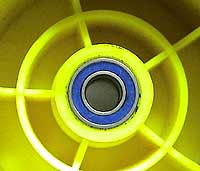
 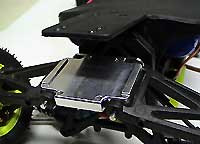 Reinstall the transmission, dog bones and remount the shocks. Remove the rear tires and install your new bearings.....ohhh baby they spin SO smooth! Same deal as the front end. Make sure not to overtighten the wheel nuts and give them a few spins to make sure there is no drag.
 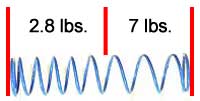 The
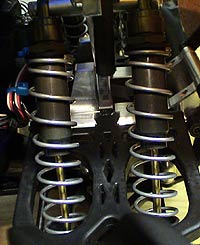
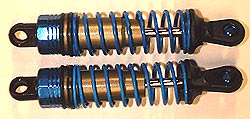
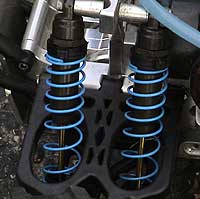
springs come in a package of eight. We opted for the "blue"
springs to match the scheme of our truck. FFRC offers them in a variety
of colors to best match your ride (blue, red, purple, green, yellow
and silver). The springs are a dual rate design and have two separate
spring rates. Total length of the springs is 3.1035 Inches. The first
1.7435 inch of the spring has six coils rated at 2.8 pounds per inch.
This softer rate helps soak up the smaller bumps and keep the bounce
to a minimum when traveling at high speeds. The second half (1.36 Inches)
has 3 coils rated at a much stiffer 7 pounds per inch. This helps keep
the truck from bottoming out the shocks when landing on big jumps. FYI
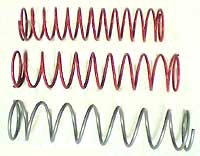
- stock Traxxas springs are spec'ed out at about 2 pounds. Reference
the picture to the left: Note the FFRC spring on the bottom, the stock
Traxxas spring in the middle and the Traxxas Big Bore spring on the
top.
The
springs come in a package of eight. We opted for the "blue"
springs to match the scheme of our truck. FFRC offers them in a variety
of colors to best match your ride (blue, red, purple, green, yellow
and silver). The springs are a dual rate design and have two separate
spring rates. Total length of the springs is 3.1035 Inches. The first
1.7435 inch of the spring has six coils rated at 2.8 pounds per inch.
This softer rate helps soak up the smaller bumps and keep the bounce
to a minimum when traveling at high speeds. The second half (1.36 Inches)
has 3 coils rated at a much stiffer 7 pounds per inch. This helps keep
the truck from bottoming out the shocks when landing on big jumps. FYI
- stock Traxxas springs are spec'ed out at about 2 pounds. Reference
the picture to the left: Note the FFRC spring on the bottom, the stock
Traxxas spring in the middle and the Traxxas Big Bore spring on the
top. 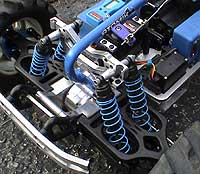 Ok…time
to bash! We ran the springs through a number of different terrains.
At higher speeds, the springs seemed to do a real nice job soaking up
some of the little stuff while retaining a decent ride height and not
getting overly bouncy. In this scenario, they performed very similar
to the stock shocks. We then proceeded to give them some bigger jumps,
tossing the truck 3-6 feet in the air at some pretty fast rates of speed.
The springs did a great job, only bottoming out occasionally on the
6+ foot jumps. This is partially due to the weight of our truck. It
is packed with aluminum goodies and is a fatty.
Ok…time
to bash! We ran the springs through a number of different terrains.
At higher speeds, the springs seemed to do a real nice job soaking up
some of the little stuff while retaining a decent ride height and not
getting overly bouncy. In this scenario, they performed very similar
to the stock shocks. We then proceeded to give them some bigger jumps,
tossing the truck 3-6 feet in the air at some pretty fast rates of speed.
The springs did a great job, only bottoming out occasionally on the
6+ foot jumps. This is partially due to the weight of our truck. It
is packed with aluminum goodies and is a fatty. 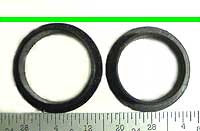 Installation is pretty simple. Shock removal is not required for a spring
upgrade. You can just remove the lower shock mount, remove the lower
spring cup and slide the spring off. On a heavier truck like ours, we
decided to install all 8 springs. On lighter trucks (stock or slightly
modified), you might want to start with 4 and go from there. Special
note: As noted above, we installed these on Big Bore shocks. For some
reason, Traxxas uses a slightly smaller outside diameter upper spring
retainer and lower spring cup on Big Bores than they do on the stock plastic shock units (reference picture to the right)?
These springs do not fit
the Big Bore upper spring retainers and lower spring cups very well? In fact it is a bad enough fit, you need to go and steal the cups and retainers off of your old plastic shocks if you are planning on running these springs on the Big Bores. Weird! Once we swapped the
retainers and cups from our original stock set and everything fit together well. This should not be an issue if you are still using stock shocks...we just want to forewarn Big Bore users.
Installation is pretty simple. Shock removal is not required for a spring
upgrade. You can just remove the lower shock mount, remove the lower
spring cup and slide the spring off. On a heavier truck like ours, we
decided to install all 8 springs. On lighter trucks (stock or slightly
modified), you might want to start with 4 and go from there. Special
note: As noted above, we installed these on Big Bore shocks. For some
reason, Traxxas uses a slightly smaller outside diameter upper spring
retainer and lower spring cup on Big Bores than they do on the stock plastic shock units (reference picture to the right)?
These springs do not fit
the Big Bore upper spring retainers and lower spring cups very well? In fact it is a bad enough fit, you need to go and steal the cups and retainers off of your old plastic shocks if you are planning on running these springs on the Big Bores. Weird! Once we swapped the
retainers and cups from our original stock set and everything fit together well. This should not be an issue if you are still using stock shocks...we just want to forewarn Big Bore users.
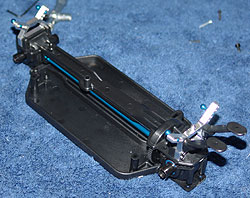
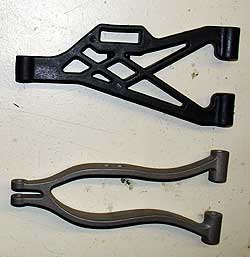
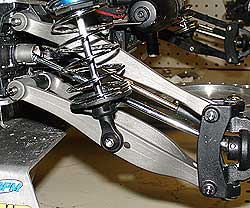
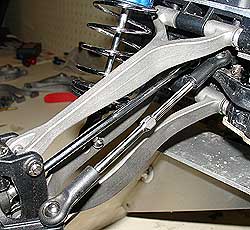
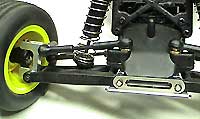
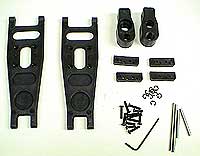
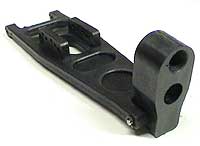
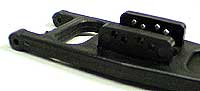
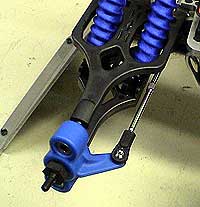
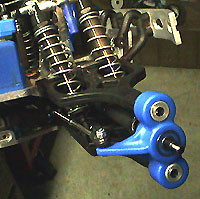
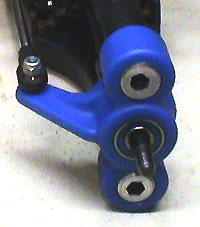
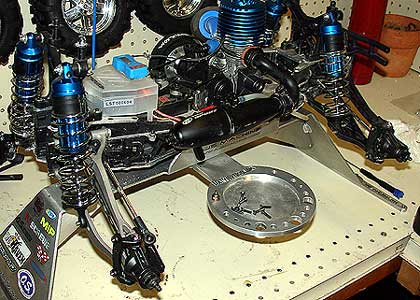
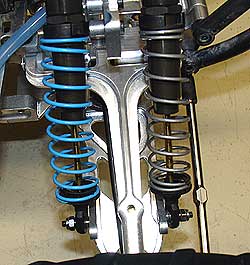
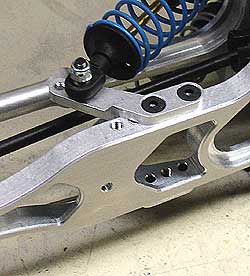
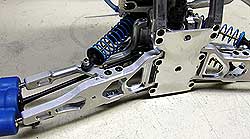
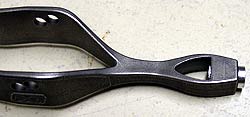
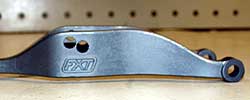
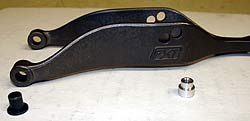
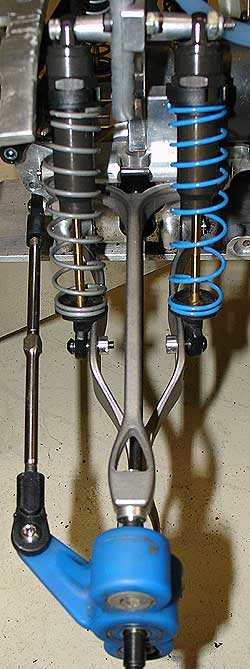
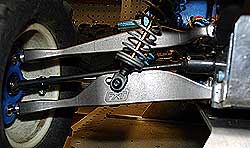
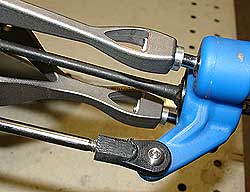
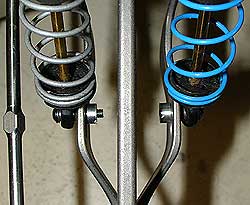
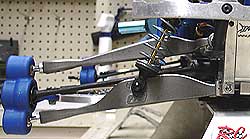
 Essentially you are replacing the lower rear suspension arms with the ones supplied in the kit. The new system doesn’t use the lower pillow balls or caps on the rear axle carriers (reducing weight). It utilizes hinge pins for the lower arm mounts. Check this….this allows you to eliminate the rear turnbuckles (further reducing weight) and forever forgetting about setting the toe on the rear of your truck. With the TTRS, it is a perfect 1 degree all the time. Without the rear turnbuckles, you will also have easier access to the lower rear shock screws. Also make note that there are four mounting positions for the lower shock mounts. This is a nice bit of added adjustability.
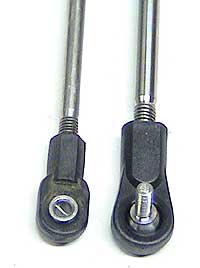 What's included in this 1/8 scale Lunsford kit?
  Once the balls were installed into the ends, we threaded the rod ends onto the 4mm titanium turnbuckle shafts. You could put the rod ends on the shafts before you installed the balls….it really doesn’t matter. Whatever trips your trigger! These shafts are MASSIVE! We have been using the 3mm titanium shafts that are included with the Pro-Line WideMaxx kit and have never bent a turnbuckle. It is going to take small arms fire to damage one of these hulking shafts! Using the supplied turnbuckle wrench along with lock jaw pliers makes installation of the rod ends a breeze. We used a rag between the lock jaw pliers and the rod ends to keep them from getting chewed up. Having the old turnbuckle assemblies laid out on the bench will help you to determine the proper length of the new ones. Take care in threading the new rod ends onto the shafts straight. Remember you are making new threads while you are cranking these on.
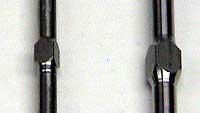 After the ends were installed and set to the proper length, we screwed the new assemblies into place. Wow. These shafts look killer!!! They are really thick and give the truck an even tougher appearance (at least for those of us who notice details such as this). (Picture to the right shows 4mm TB on right)
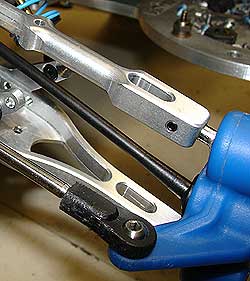
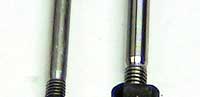 Ok….all eight hinge pins are slid into place and sixteen new e-clips are snug in their grooves. We are ready to rock. Mother Nature has been cooperating lately here in frigid Wisconsin and we are faced with a 50 degree day (heat wave) for February. We put the truck through its paces and toss it at a variety of jumps, whoops and general slams into the occasional tree (I swear they move into my way). The truck was scooting along very quickly during several impacts and landings gone bad (otherwise known as cartwheels). Not a whimper was heard from the hinge pins or the turnbuckles. Exactly what we expected. Again, we have never had any trouble from our other sets of smaller diameter Lunsford turnbuckles. The smaller TB’s used the stock rod ends and they were the weak point, twisting and breaking over time.
 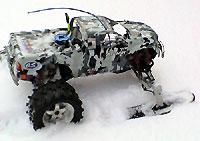 it really is. We have to admit, we never imagined these skis would work so well. They make a frosty, snowy day the perfect day for RC trucking...or should we say, RC skiing.
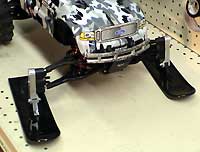
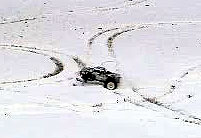 Upon opening the package, we found the necessary hardware residing nicely in it's own zip-lock bag, a set of simple instructions, axle carrier adaptors, triangle braces and of course, the skis.
 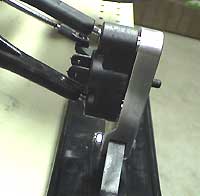 Ok - time to check out the instructions and get busy. We opted to use our 2WD T-Maxx for this job as you obviously do not need a 4wd truck for this hop-up. In fact, if you are going to install these on your 4wd truck, you will have to unhook the front drive shafts as the axle carrier adaptors integrate into the axle nuts. One of the first things stated in the instructions is "waterproof your truck before you run your truck in the snow you idiot!"... actually, FFRC stated it a bit nicer than that. But that's what they should have said! Do not for any reason think you can run your truck in the snow without performing waterproofing procedures on it first. We are not going to get into the whole procedure of waterproofing because there are a ton of other articles all over the RC web that already tell you how to do this. Let's just say for a small investment of $2 in balloons, some RTV silicone and a couple of zip ties, you are pretty much ready to go.
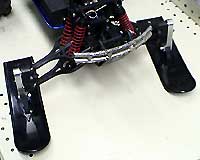
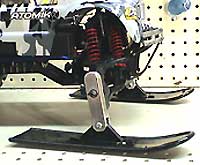
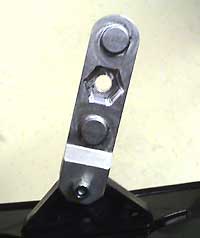 Installation is simple and the instructions keep it simple. No diagrams or anything like that but hey, if you can't figure this out on your own, it's time for a new hobby. The wheel nuts hold the carrier adaptors to the axle carriers. There is a recess for the axle nut as well as two protrusions that rest against the pillow ball caps (see picture to the right). We found our adaptors were a little too loose for our liking after tightening things down so we disassembled and added some thin washers to the inside of the axle shaft, in turn allowing us to tighten the adaptors farther into the axle carriers. They were never fully tight against the axle carriers however after an hour of snow bashing, everything was still in place and working properly. The overall design is smart as it utilizes the trucks suspension up front. So you could play around with different camber, toe-in, springs, shock placement and shock oil (just like when the wheels are bolted to it) to change how the truck drives in the snow. I think I see RC snow races in my future!
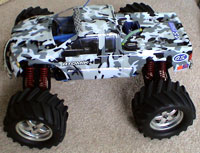
 Time to hit the slopes! We grabbed our Atomik Snow Camo body (thought it was appropriate), our winter coat and into the snow we went. Just a reminder: If you are running in cold temperatures, you will need to richen your needles up a bit. Cold air is more dense, that means your engine is getting lots of air. So you have to give it a little more fuel to keep it from running lean. This can be easily forgotten if you "live" by your temp gauge. Engine temps may be cooler in the winter but that does not necessarily mean that the engine is getting the proper amount lubrication.
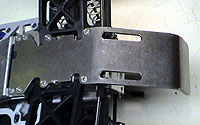
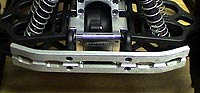
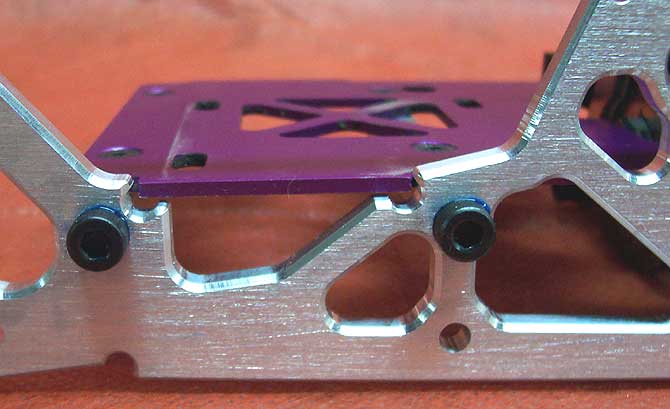
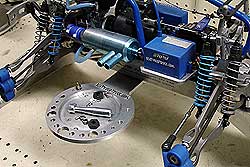
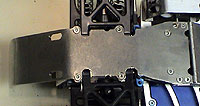 As many of us have found out the hard way, some skid manufacturers forget
all about the ever important access holes. Not GARC. They did an excellent
job with a-arm pin access holes in the front and rear plates (note the
slots in the skids in the pictures). This may not seem like a big deal
until you have to pull plates to change a simple hinge pin. Thanks GARC!
As many of us have found out the hard way, some skid manufacturers forget
all about the ever important access holes. Not GARC. They did an excellent
job with a-arm pin access holes in the front and rear plates (note the
slots in the skids in the pictures). This may not seem like a big deal
until you have to pull plates to change a simple hinge pin. Thanks GARC!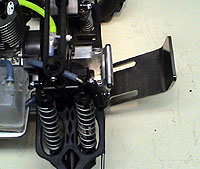 The
bends and angles are all in the perfect spots. The skids are nicely
notched for full a-arm movement and the screw holes are countersunk
to the perfect depth. We opted for a set of stainless screws from RC
Screws to hold these bad boys on. All the holes lined up perfectly.
Skids this thick and strong will not tolerate any wimpy hardware. In
fact they will eat soft screws for breakfast. Dave at Great Assembly
suggested when installing these skids to skip the Loctite. "Skip
the Loctite?"...hmmmm. Then it dawned on us. These skids are so
tough that if anything is going to break, it is going to be the hardware
or the bulkheads (if you are using plastic bulks). So by skipping the
Loctite, if your screws break they will be easy to get out. Makes sense
to us! Although in our moderate to heavy slam sessions with these skids,
no hardware or other damage occurred. We'll get to that in a minute.
The
bends and angles are all in the perfect spots. The skids are nicely
notched for full a-arm movement and the screw holes are countersunk
to the perfect depth. We opted for a set of stainless screws from RC
Screws to hold these bad boys on. All the holes lined up perfectly.
Skids this thick and strong will not tolerate any wimpy hardware. In
fact they will eat soft screws for breakfast. Dave at Great Assembly
suggested when installing these skids to skip the Loctite. "Skip
the Loctite?"...hmmmm. Then it dawned on us. These skids are so
tough that if anything is going to break, it is going to be the hardware
or the bulkheads (if you are using plastic bulks). So by skipping the
Loctite, if your screws break they will be easy to get out. Makes sense
to us! Although in our moderate to heavy slam sessions with these skids,
no hardware or other damage occurred. We'll get to that in a minute. The skids are designed with a upward bend that serves as a bumper. In fact
the bend/lip is a bit farther out than the stock bumper configuration.
We felt that the angle of the skids looked good and would promote "glancing".
That is, allowing the skids to glance over an object rather than slam
into it. We opted to leave the bumpers off during our testing. We put
these plates through a number of severe beatings. In fact we even broke
an engine mount during a cartwheel (there were a number of cartwheels
and endos going on - something was bound to break). Simply put, these
plates do NOT give. No flex. We can't imagine how hard you would have
to hit something to get these to bend.
The skids are designed with a upward bend that serves as a bumper. In fact
the bend/lip is a bit farther out than the stock bumper configuration.
We felt that the angle of the skids looked good and would promote "glancing".
That is, allowing the skids to glance over an object rather than slam
into it. We opted to leave the bumpers off during our testing. We put
these plates through a number of severe beatings. In fact we even broke
an engine mount during a cartwheel (there were a number of cartwheels
and endos going on - something was bound to break). Simply put, these
plates do NOT give. No flex. We can't imagine how hard you would have
to hit something to get these to bend.
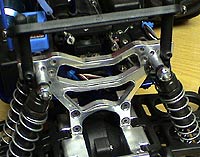
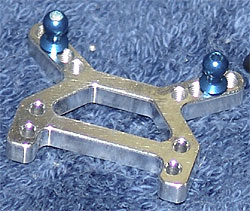
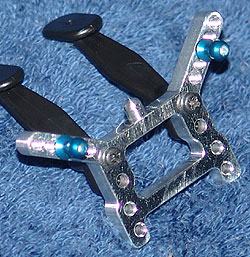
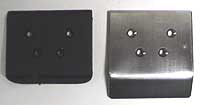
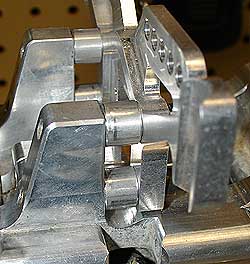
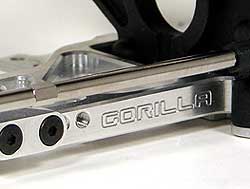
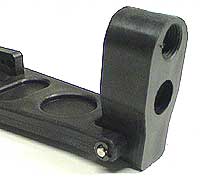
 QUALITY & FEATURES - SHOCK TOWERS
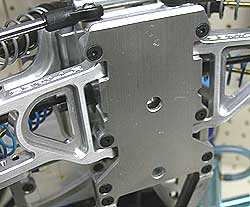
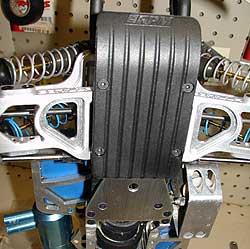
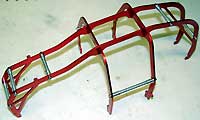 QUALITY & FEATURES - ROLL CAGE
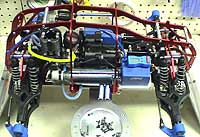 The quality of the cage is very good and it provides an excellent level of protection to the truck vitals. It does this without limiting access to your trucks goodies. Meaning you can still make adjustments, perform maintenance etc without having to remove the cage. This is a huge advantage over other full roll cages on the market today. The hardware and spacers are very good quality. The cage features nice cut-outs for the edge of a standard chassis however it also worked well in conjunction with our Spider chassis. Note: the lower roll cage mounting plate acts as a center skid plate and due to the design, it may interfere with certain truck stands. It wraps around the chassis braces and widens that area slightly. (Not a big deal I just wanted to mention that for those of you who recently bought an AJS stand - it doesn't fit very well on the stand).
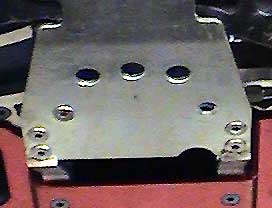 PERFORMANCE - SKID PLATES
 FIT / FINISH / APPEARANCE - SHOCK TOWERS